Running Krill Under RIPE NCC

When using RPKI in the RIPE NCC service region you have the choice between using the Hosted RPKI service in the LIR Portal, or running Delegated RPKI. While using the RIPE NCC's web interface to manage Route Origin Authorisations (ROAs) works great, running Delegated RPKI with free, open-source Krill Certificate Authority (CA) software has several advantages:
- You can seamlessly manage multiple entities in a single Krill instance, even spanning several RIR service regions.
- You can easily publish Krill's ROAs in a repository offered by your RIR as a service; currently either RIPE NCC, ARIN or APNIC.
- You can delegate resources to other business units or customers, who in turn run their own CA to manage ROAs.
- You can configure named users with roles and permissions over specific resources and business units.
- Krill's Prometheus endpoint easily integrates monitoring and alerting with your existing tooling.
- And of course, you will be the only holder of the private key of your resource certificate.
RPKI Publication as a Service
The model where you run your own Certificate Authority (CA) and publish with a third party is colloquially called Hybrid RPKI. Like ARIN and APNIC, the RIPE NCC offers resource holders RPKI Publication as a Service. This service lets you publish your ROAs in a well monitored, highly-available service operated by your RIR. This is highly recommended as it reduces the costs and risks of running one's own delegated CA dramatically.
Moreover, the RIPE NCC lets you provision multiple repositories, which is great! This way you can delegate resources to other business units or customers who in turn run their own CA, who can also publish in the RIPE NCC repository instead of having to run their own.
Keep in mind that the RPKI publication service offered by your RIR is tied to your membership. This, along with the service level, support availability and other aspects that may be important to you should factor into the choice you make. Note that you can always migrate to a different repository later on, or run your own.
Before You Get Started
We'll provide a step-by-step guide how you can run Krill under the RIPE NCC. Before getting started there are a few things you need:
- IPv4 or IPv6 resources allocated to your organisation(s)
- Access to the LIR Portal with the "Resources" permission
You can gain operational experience by first setting up Krill in the RIPE NCC RPKI Test Environment. The test environment runs under a separate Trust Anchor and doesn't affect anything in your existing production setup. However, RIPE NCC's RPKI Publication as a Service is not available in their test environment and can't be set up if you still have an active hosted CA. Instead, you can register a publisher in the NLnet Labs RPKI Testbed.
Once you're comfortable and want to start using Krill in production, you will first need to revoke your existing hosted CA. We'll show you how to do this in the guide.
Setting Up Krill
The first step is to set up a production Krill instance for your CA. You can of course follow our comprehensive documentation, but if you want to have a look at how we set up our own Krill CA server, with multi-user logins and Let's Encrypt and NGINX for secure access, then please have a look at the section called "Production CA Server with Multi User Access Setup" in this blog post. Note that you can skip the first part about the set up of a Krill Publication Server, because you can (and should) use the RIPE NCC's RPKI Publication as a Service instead.
For the purposes of this article we've quickly spun up a Debian 11 "bullseye" virtual machine and followed the Quick Start from the documentation. After adding the NLnet Labs package repository we ran apt install krill, fetched the authentication token from the generated configuration file at /etc/krill.conf and then started the service.
By default, Krill exposes it's user interface and API on localhost via HTTPS, using a self-signed TLS certificate. Of course you can set up a reverse proxy with a real certificate—in fact we recommend that—but for now we'll SSH into the VM using:
ssh -L 3000:localhost:3000 user@krillserver.example.netNote that in addition to the user interface, every function of Krill can be controlled from the command line interface (CLI). The Krill CLI is a wrapper around the API, which is based on JSON over HTTPS.
For this article we'll open https://localhost:3000 in a local browser, accept the certificate security warning for now and get started in Krill's UI.
Configuring Your RPKI CA Under the RIPE NCC
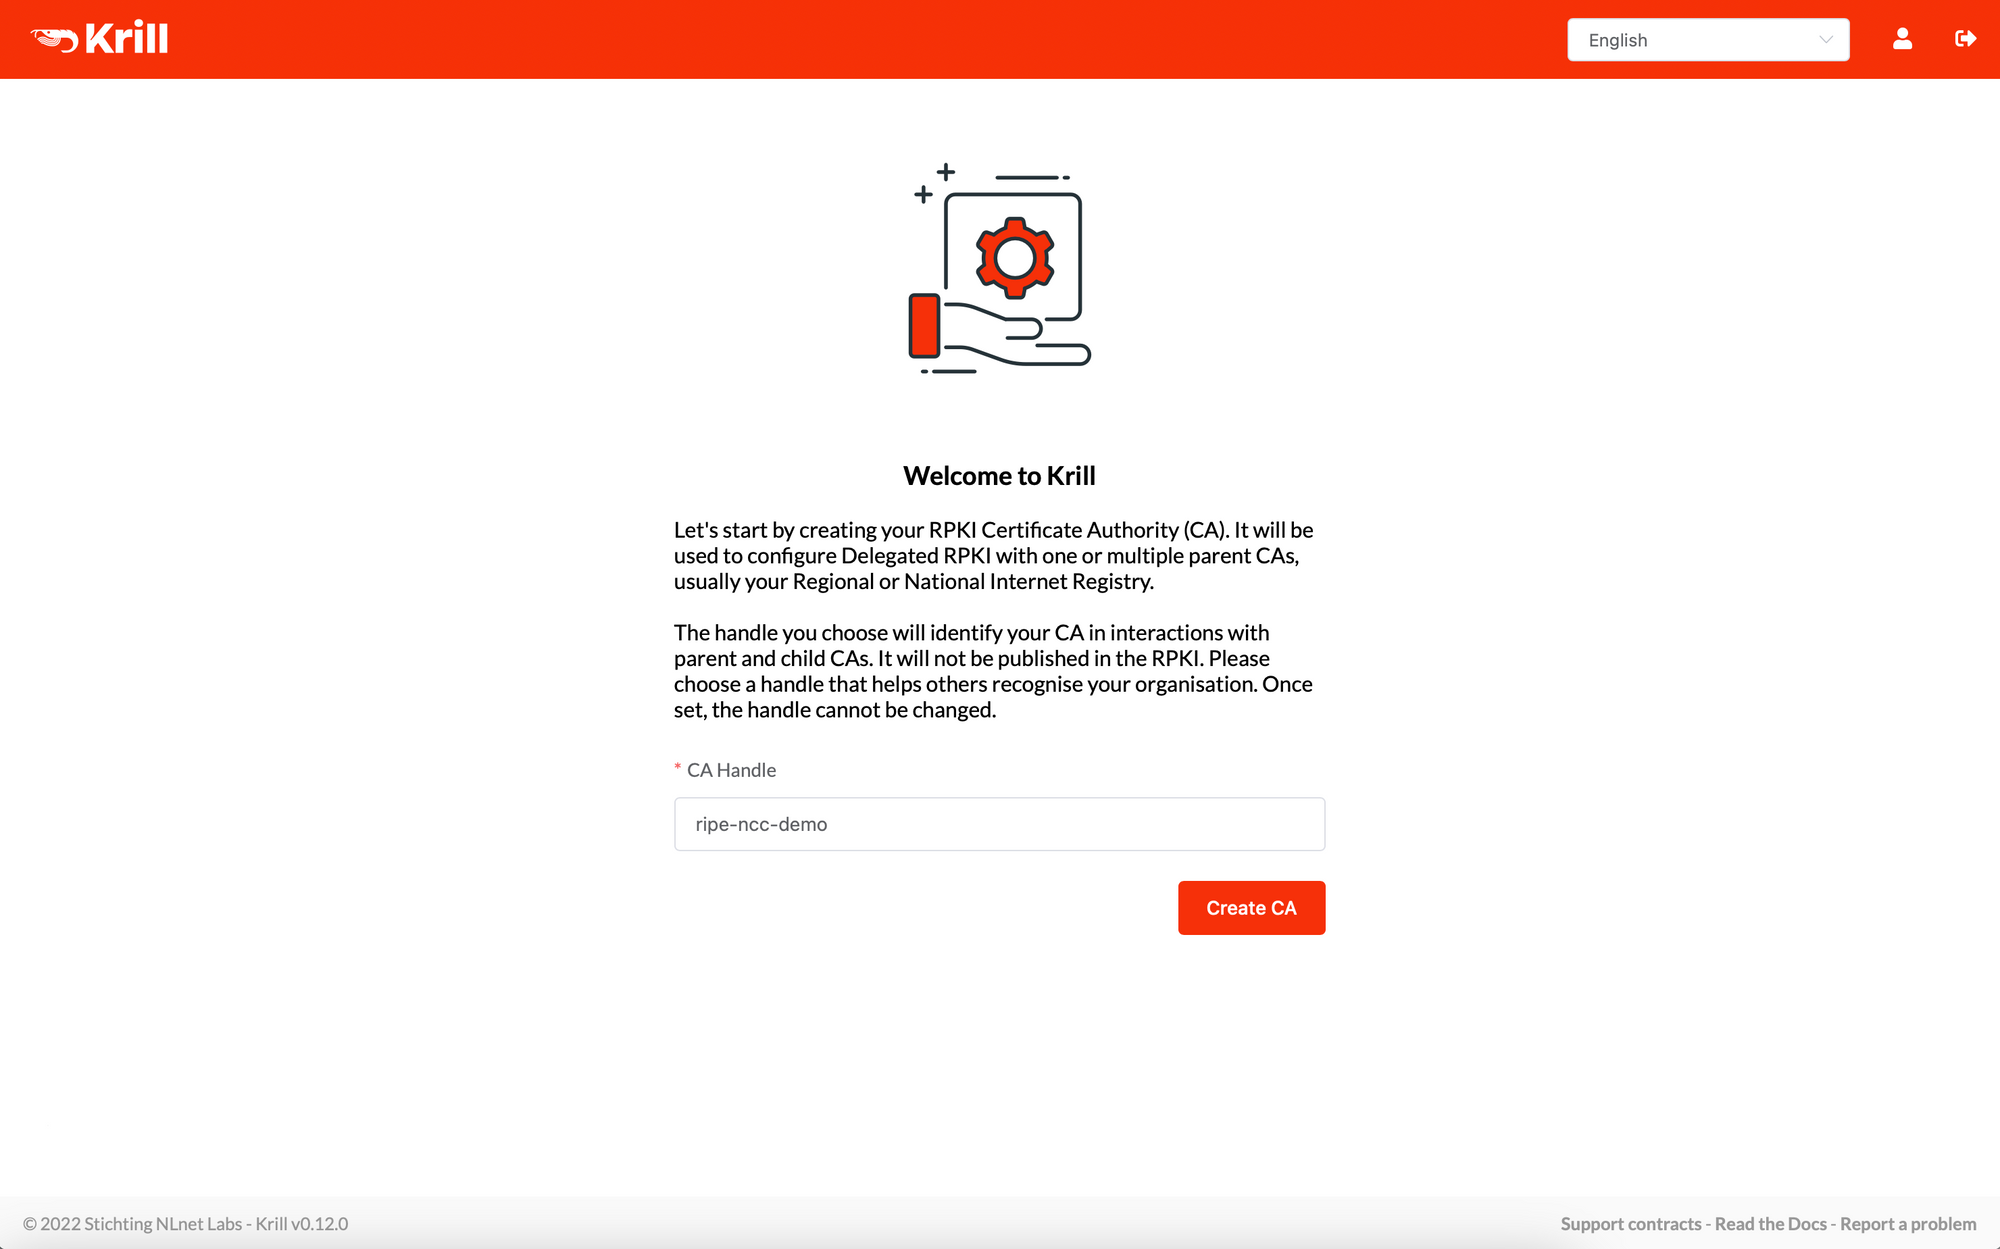
After logging into the Krill UI, you'll be asked to set a CA Handle. This is name that helps you and others recognise your organization. The handle must consist only of alphanumeric characters, dashes and underscores. We'll keep it simple and choose the name ripe-ncc-demo:
If you prefer using the CLI you need to invoke krillc followed by one or more subcommands. You can set default values via environment variables for the most common arguments that need to be supplied, e.g.:
export KRILL_CLI_TOKEN="correct-horse-battery-staple"
export KRILL_CLI_MY_CA="ripe-ncc-demo"
After setting the correct environment variables for your configuration, use krillc add and set a handle like we just did in the user interface:
krillc add --ca ripe-ncc-demoRevoke Your Existing CA
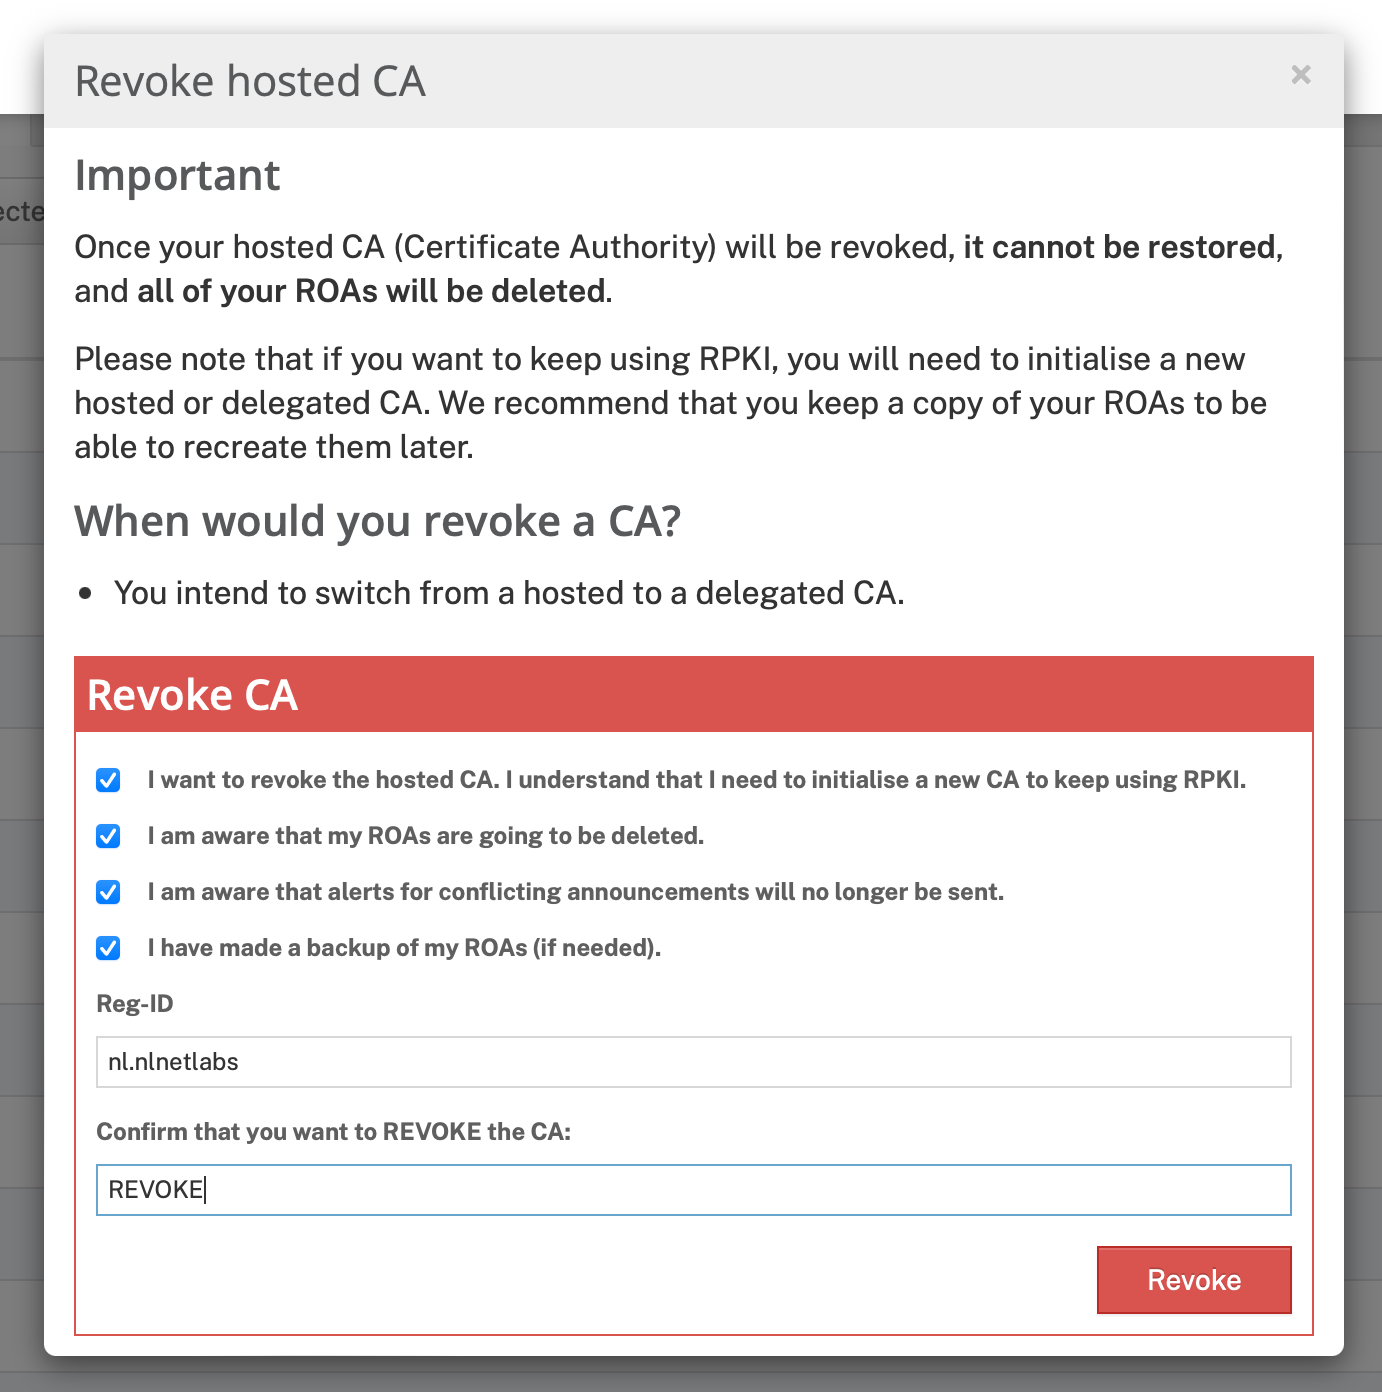
As said, if you're currently using Hosted RPKI you'll need to delete your existing configuration. In the bottom right corner of the RPKI dashboard in the LIR Portal you'll find a red link saying "Revoke hosted CA". Click it, check all the checkmarks and fill in the required fields:
Configure Delegated RPKI
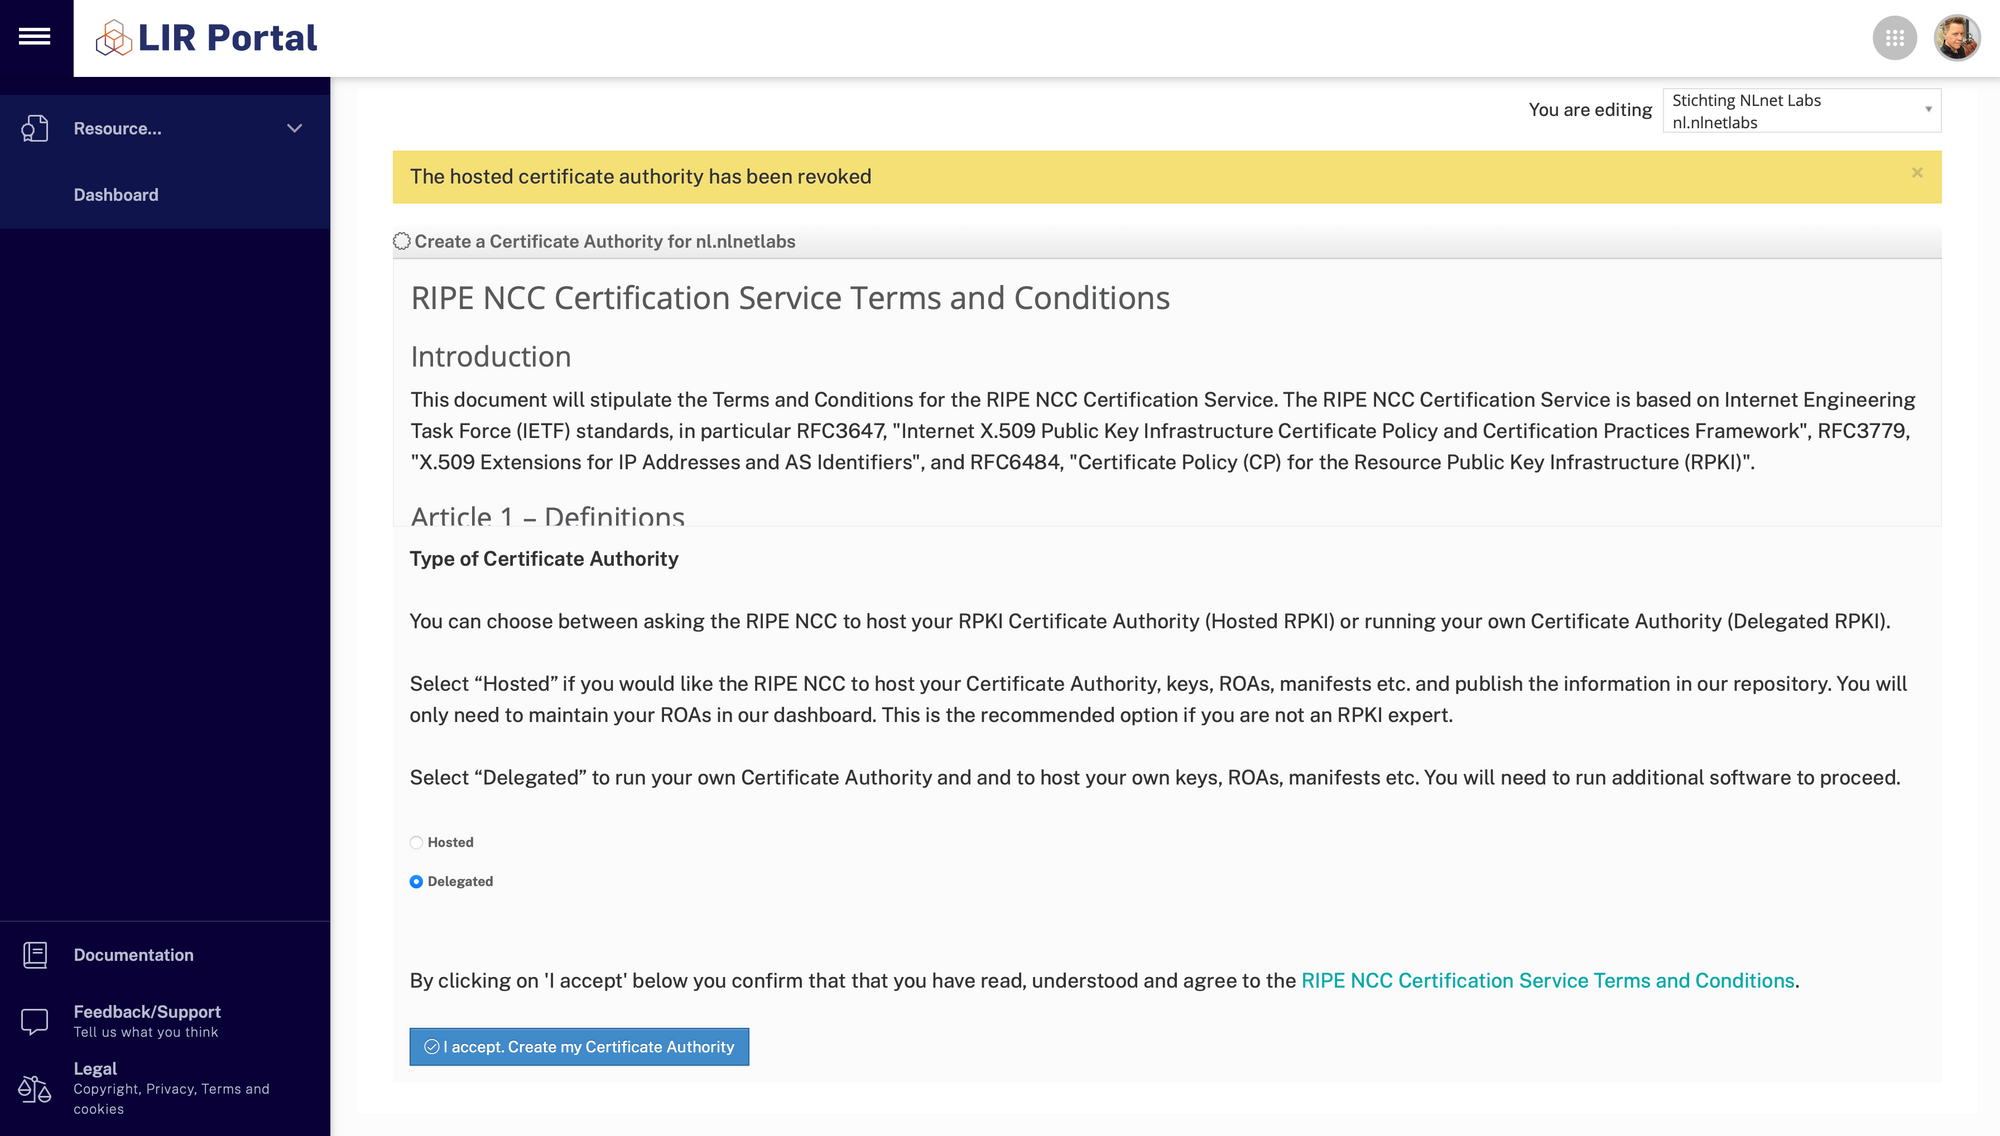
You'll now land at the start page to set up your Certificate Authority. Select the "Delegated" radio button and accept the Terms & Conditions to create your new CA:
The Parent/Child Exchange
The first step is to provide your RFC8183 Child Request XML file to the RIPE NCC. Do do this, go to the Parents tab in Krill and download the request file:
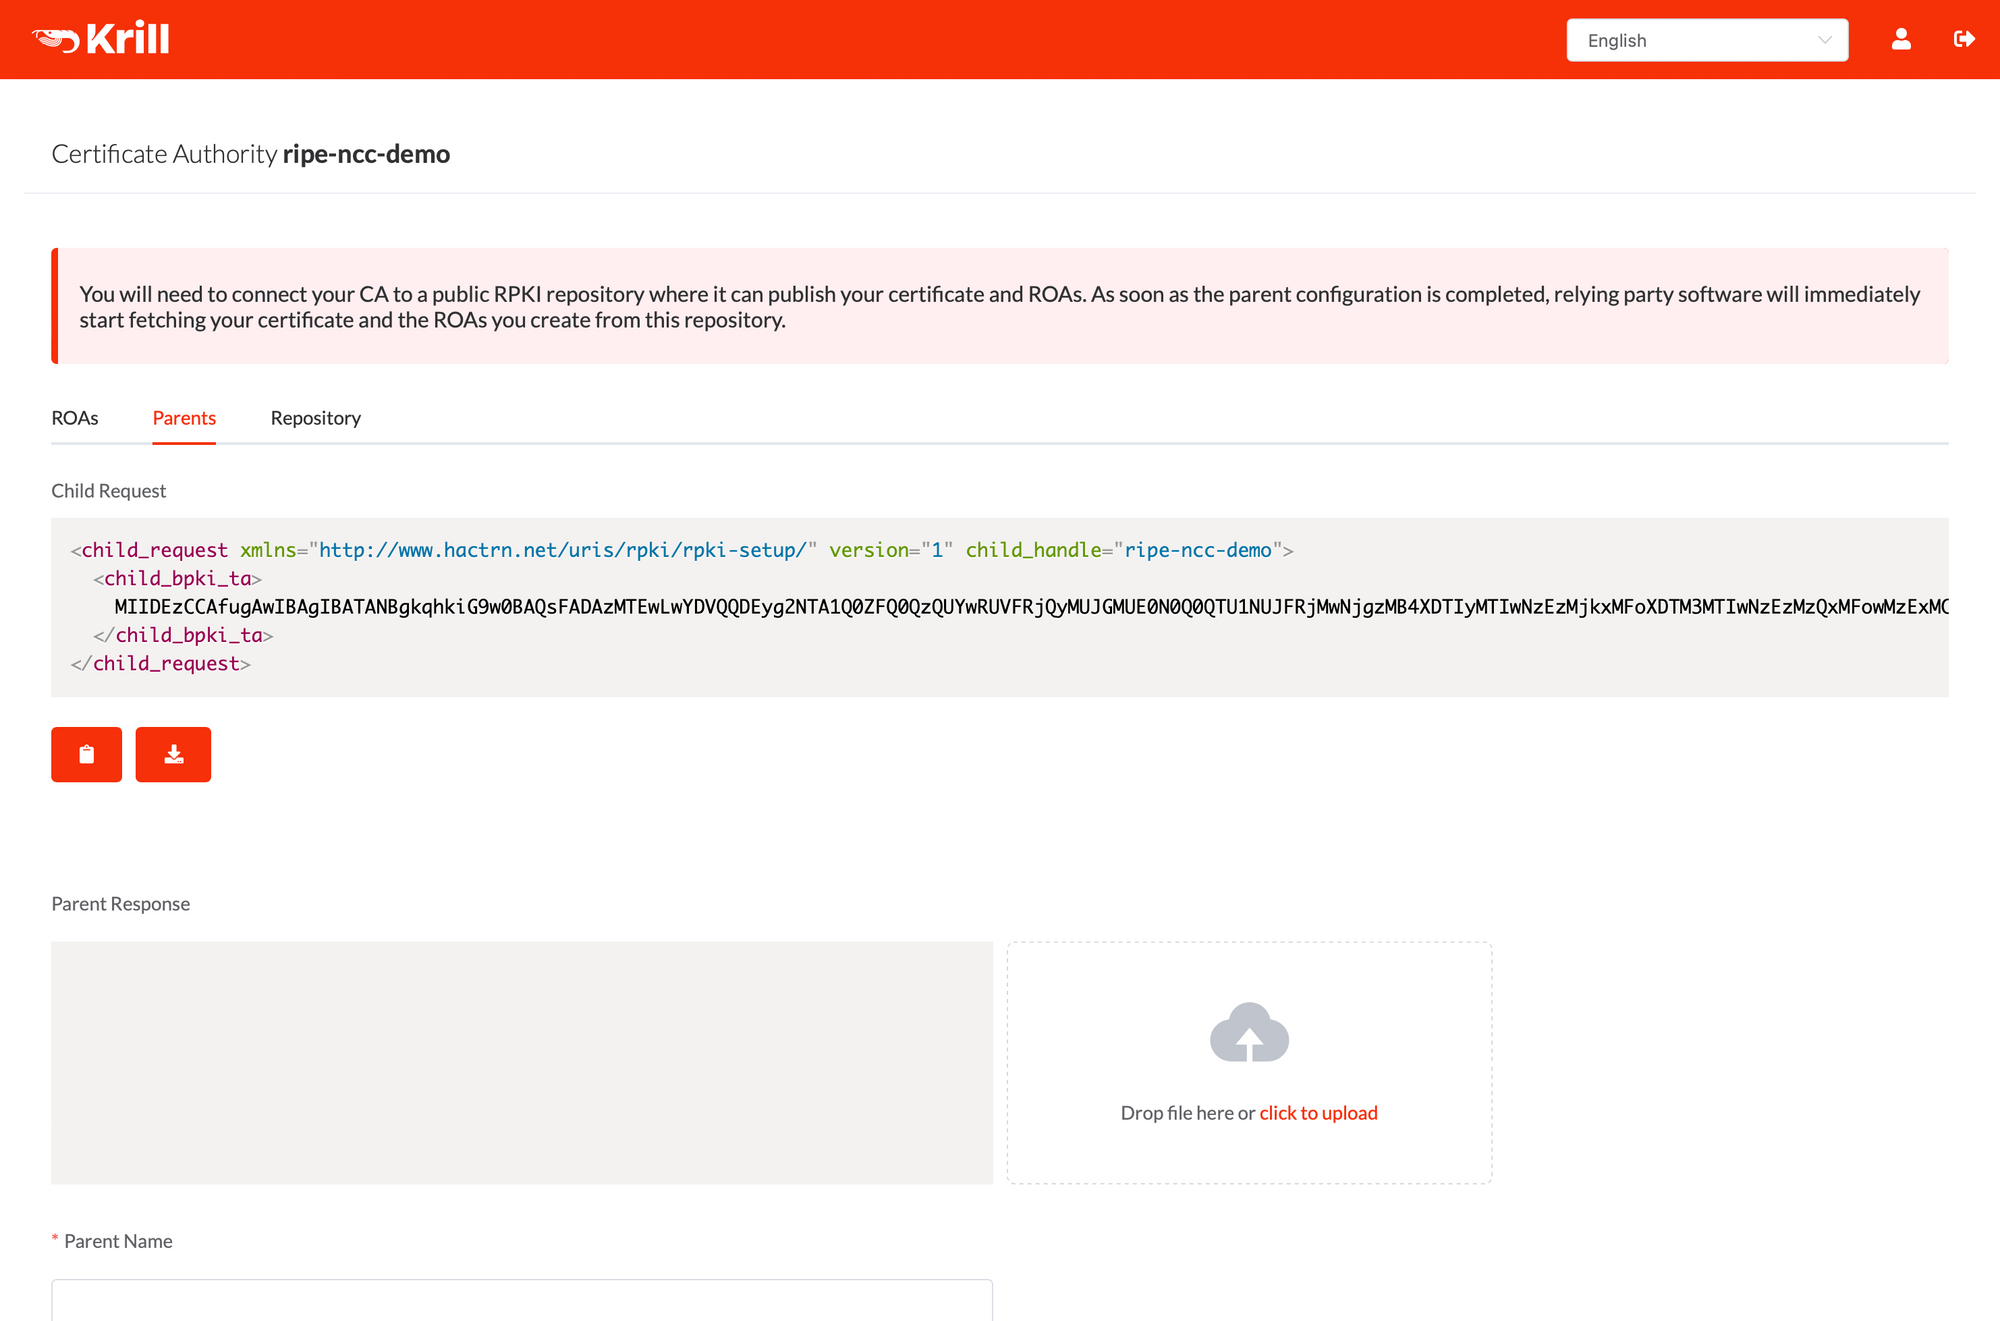
You can do this from the command line with the krillc parents request subcommand:
krillc parents request --ca ripe-ncc-demoAfter uploading the file in the LIR Portal, you'll get a confirmation and an offer to download the server's identity XML file:
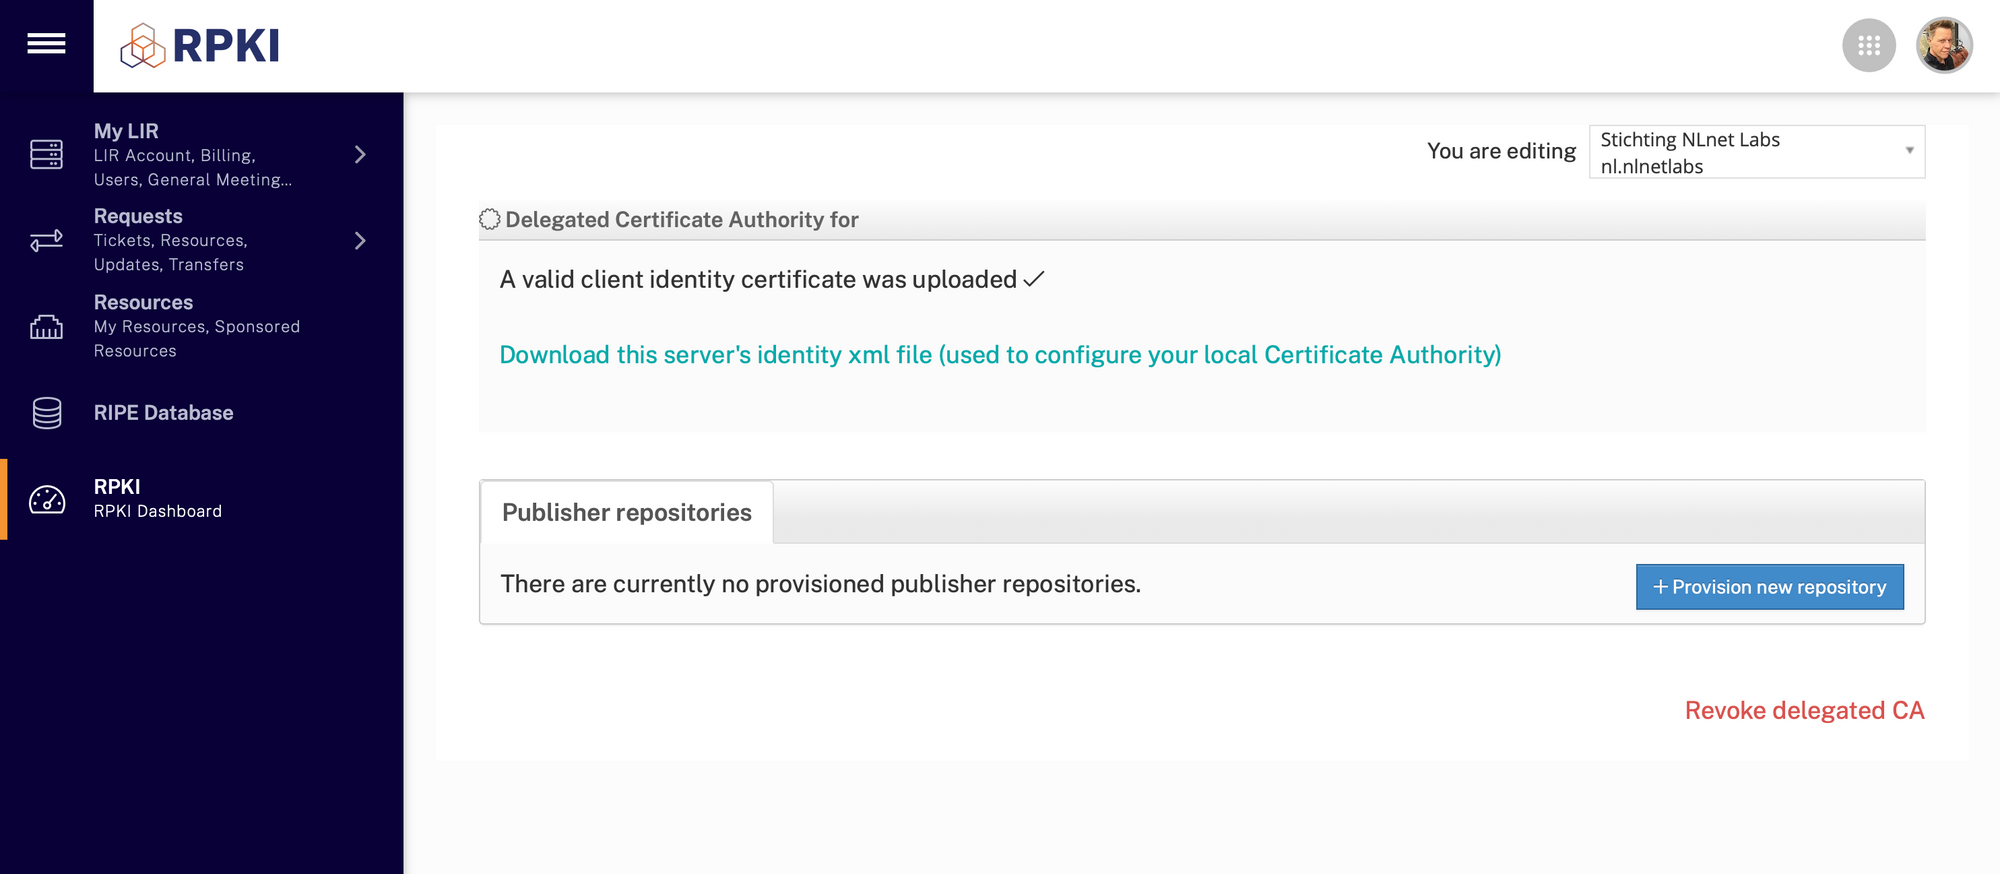
Fetch the server's XML file and give back it to Krill by uploading it in the Parents tab:
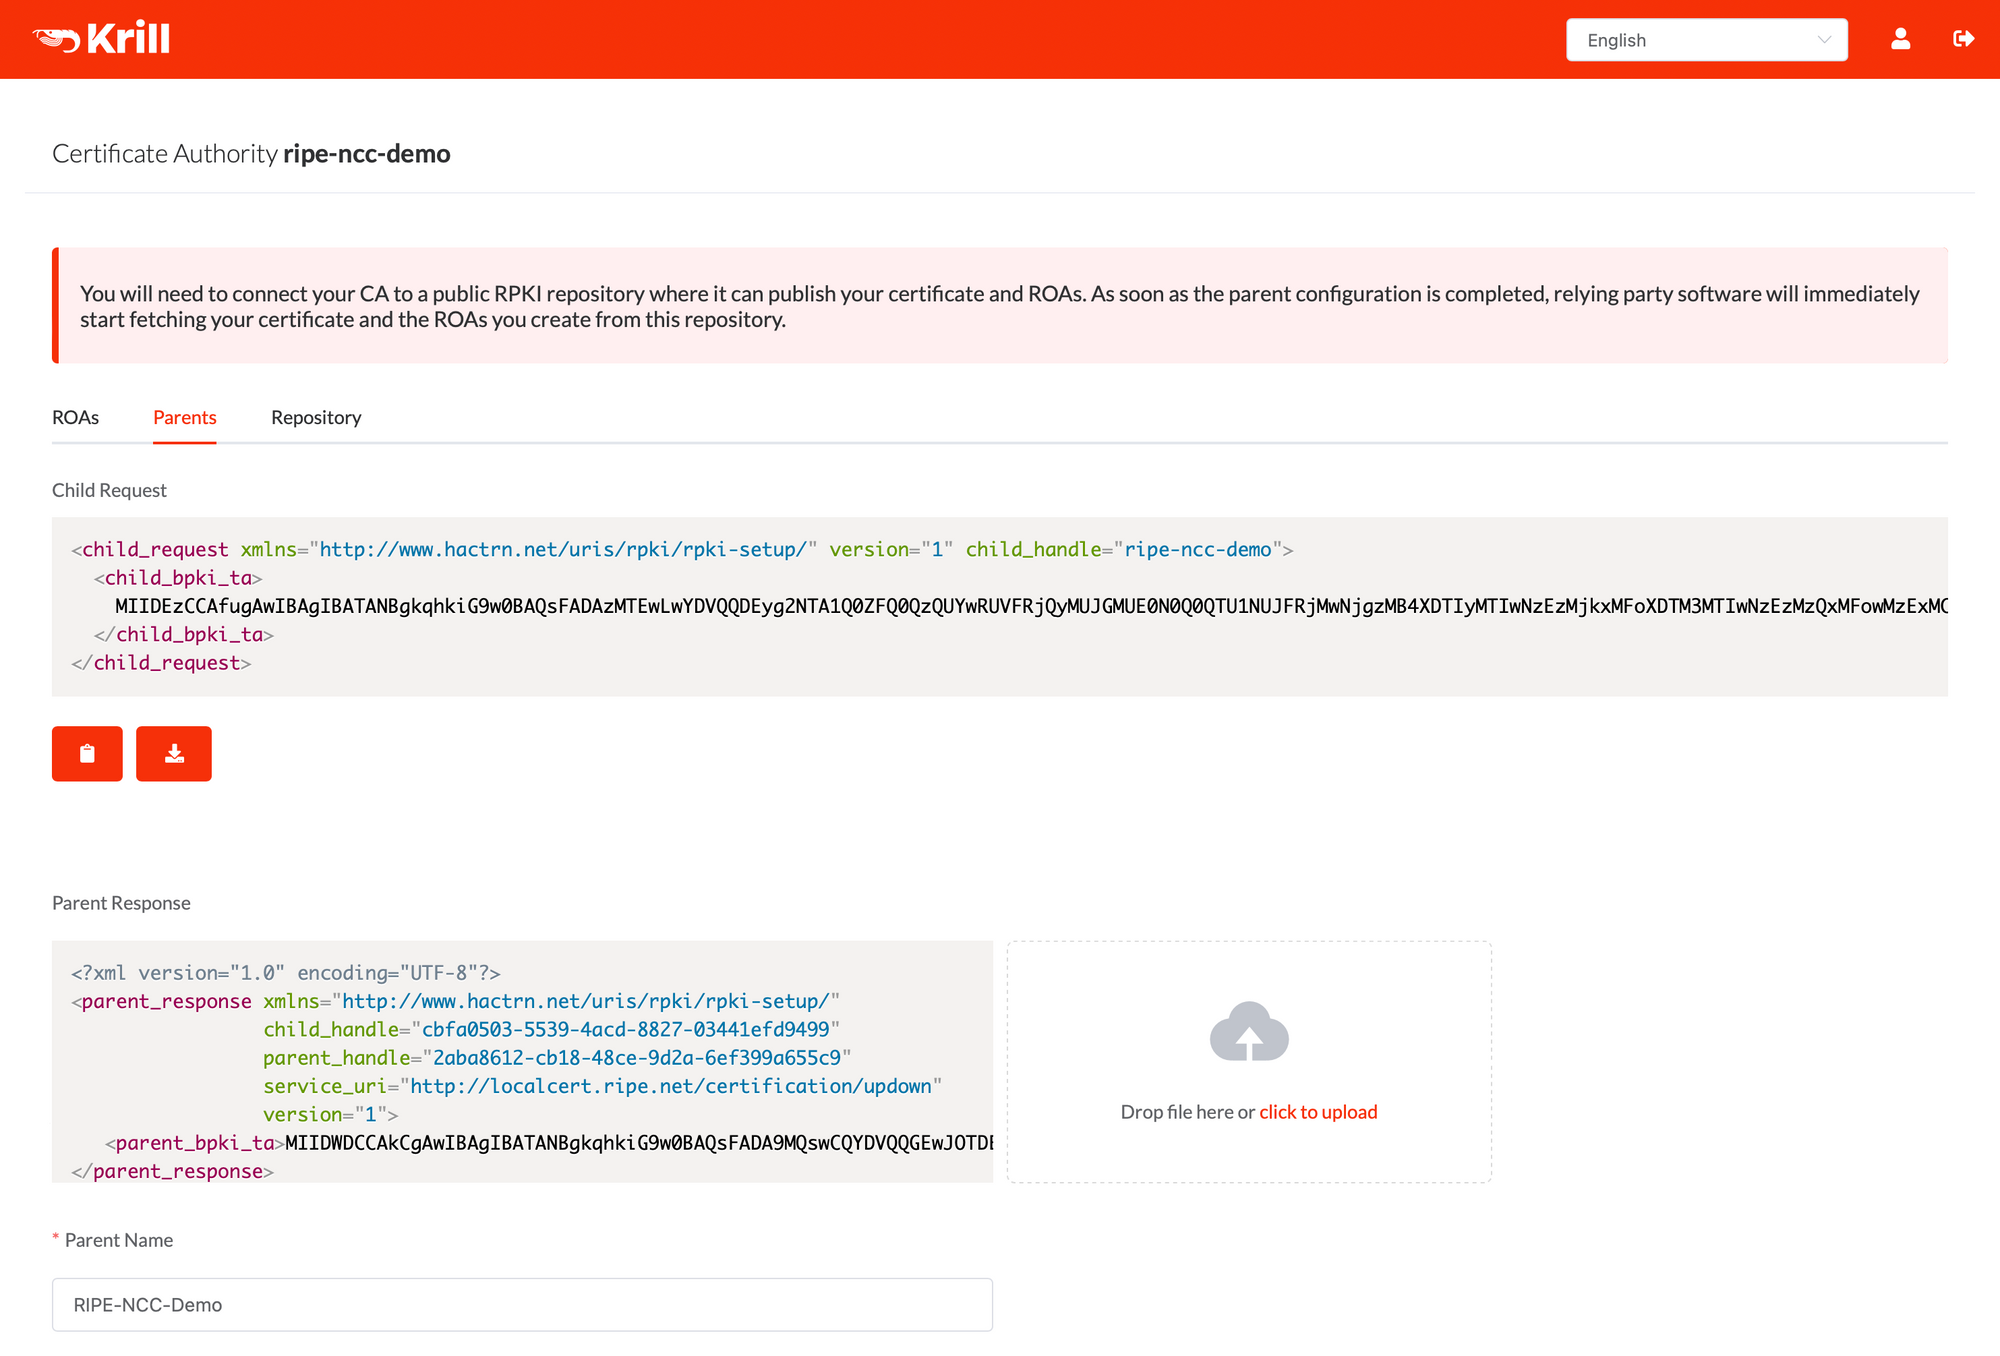
After uploading the file, Krill will generate a "Parent Name" using information from the identity XML. In many cases this is not a descriptive name, so you can replace it with something that makes sense for you. This is especially convenient if you are configuring more than one CA, possibly under multiple RIRs. In this example we've entered "RIPE-NCC-Demo". Now click Confirm at the bottom of the page to continue.
To perform these steps from the command line, use the krillc parents add subcommand, in this case making use of the --api flag. Because the API also supports a JSON format, the parent local handle can be explicitly specified. If you use the CLI then it will expect that you provide this local handle, parse a supplied XML file, and then combine both in a JSON body sent to the server:
krillc parents add \
               --parent RIPE-NCC-Demo \
               --response ./data/issuer-identity.xml \
               --api
Now that Parent/Child CA communication is established, Krill will receive all AS Numbers and IP resources you are entitled to. There are periodic checks to verify if there are any changes in your entitlements, which will be updated automatically.
The Publisher/Repository Exchange
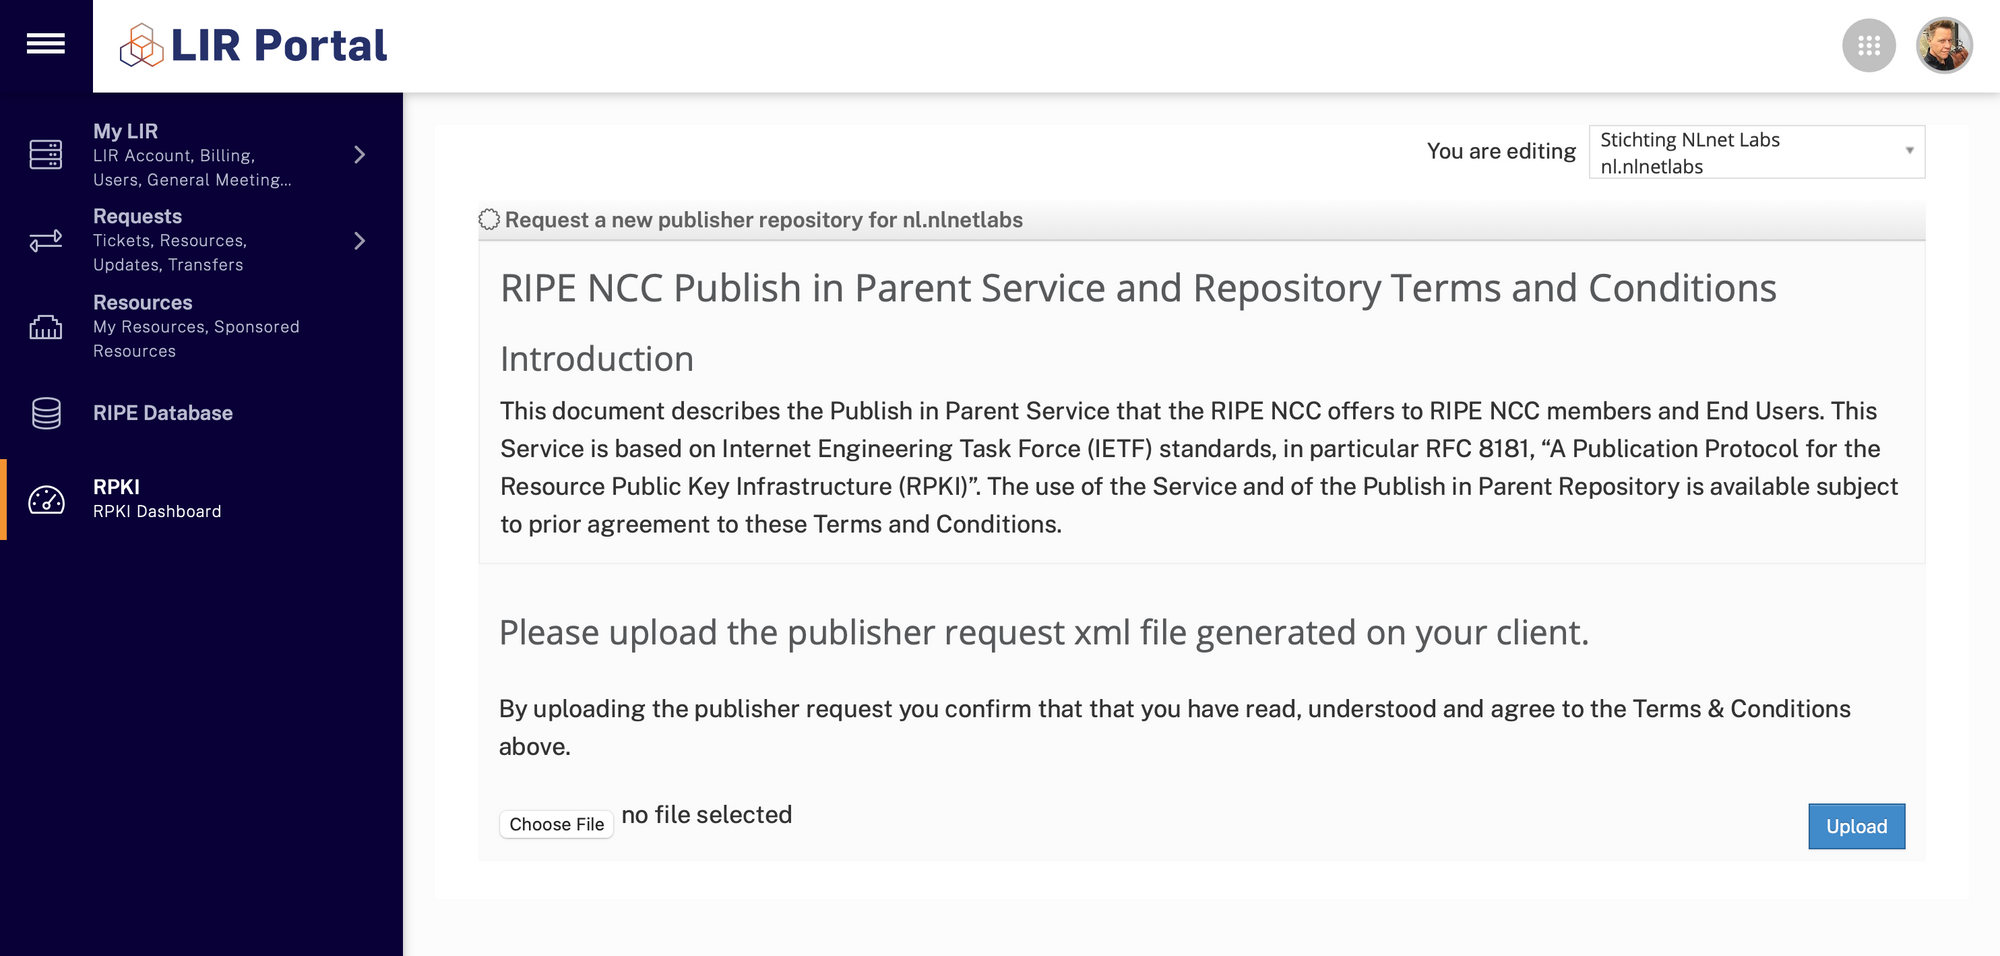
Because we want to use the RIPE NCC's RPKI Publication as a Service, we'll now go through similar steps to submit a Publisher Request in the LIR Portal and give a Repository Response back to Krill.
You'll do the second exchange in the Repository tab:
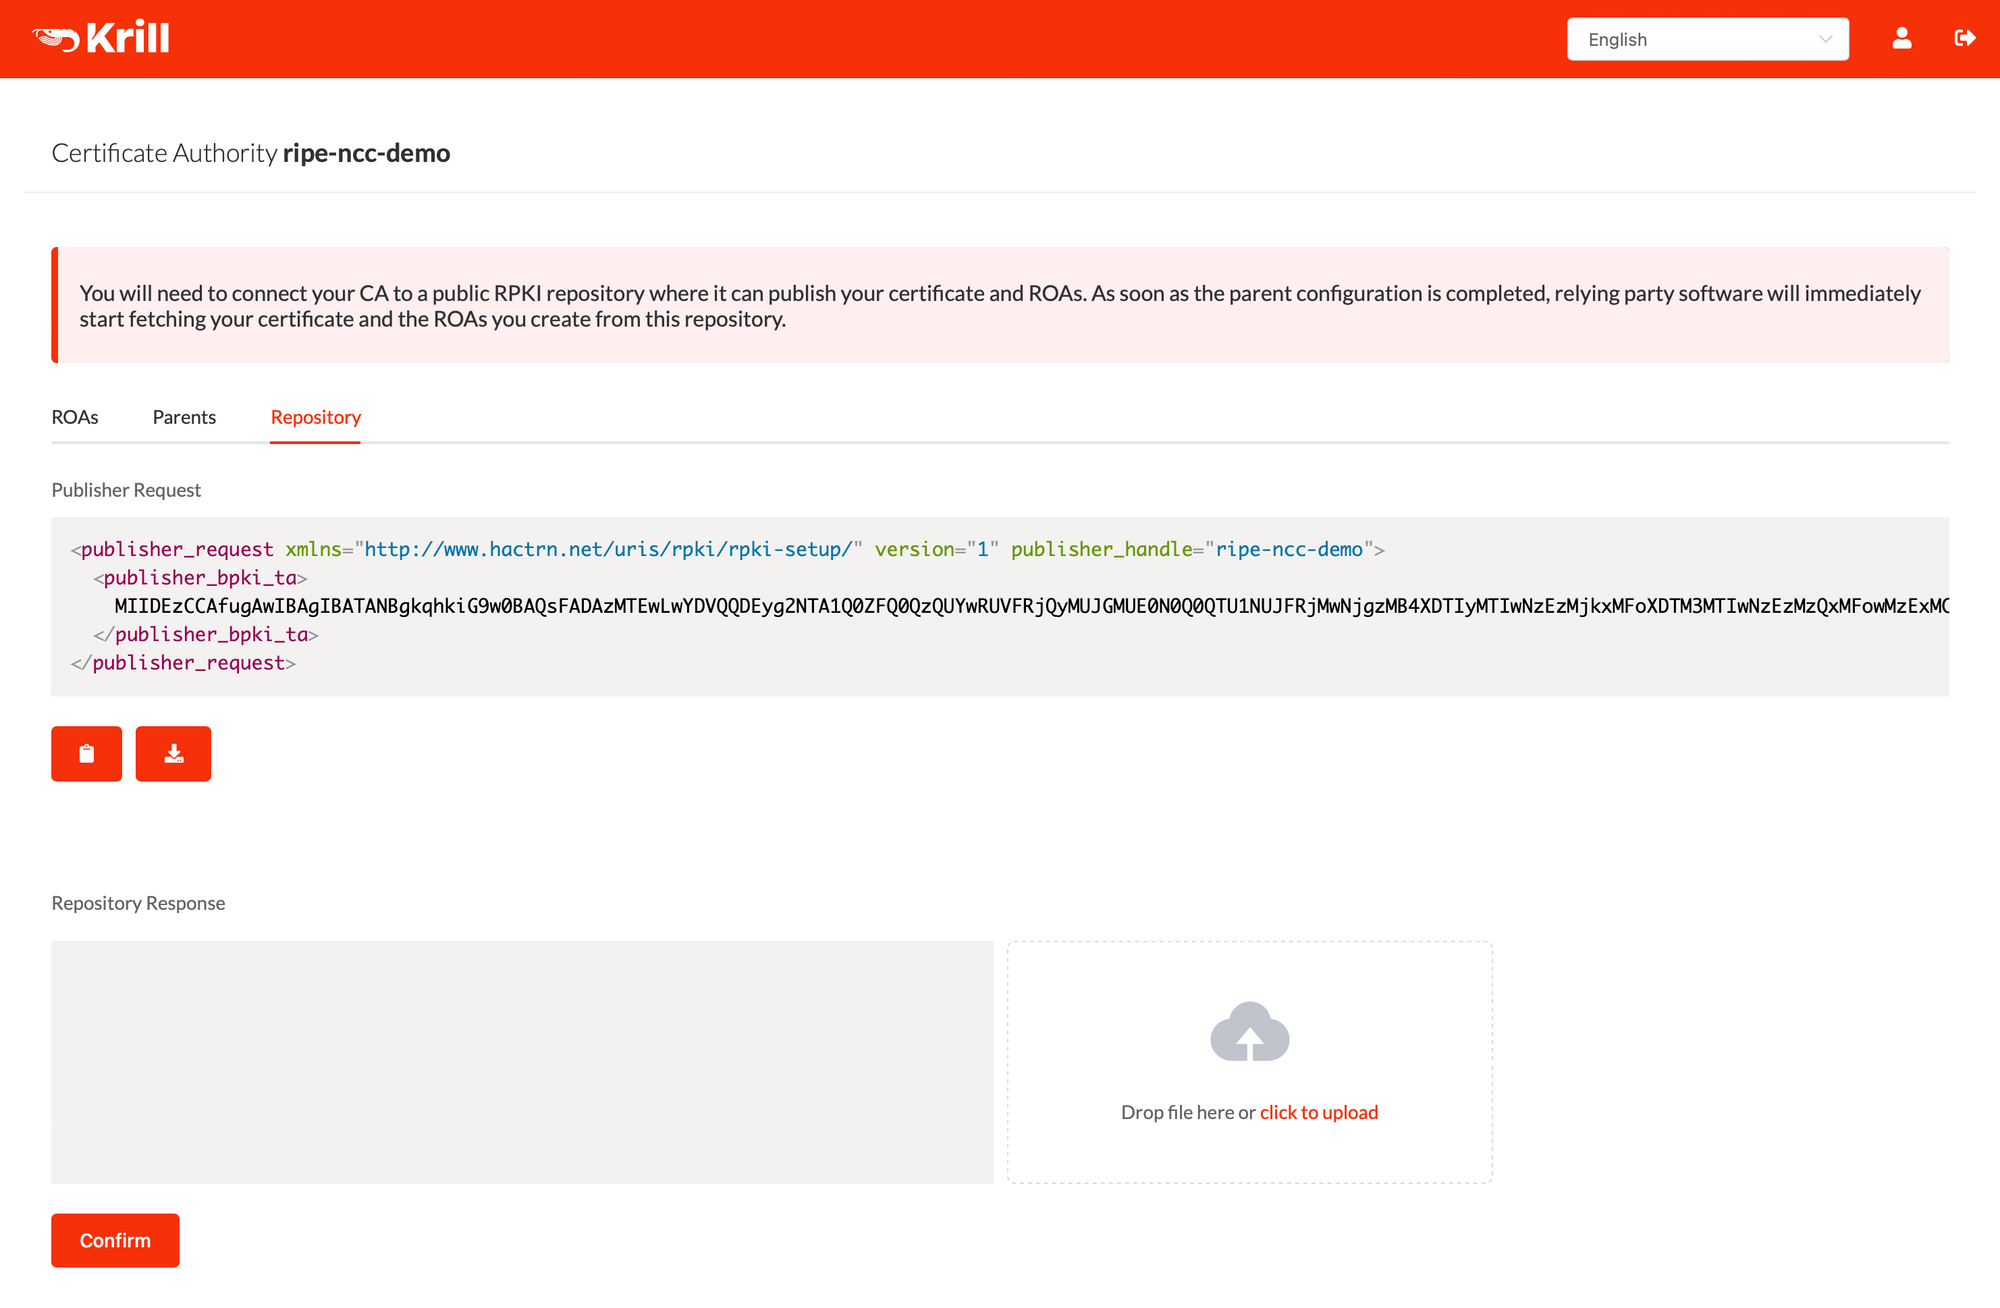
Fetch the Publisher Request XML file by clicking the download button. Alternatively, you can use krillc repo request:
krillc repo request --ca ripe-ncc-demoNow, go back to the LIR Portal. In the "Publisher repositories" section, click the Provision new repository button:

In the next screen you upload the Publisher Request XML you got from Krill:
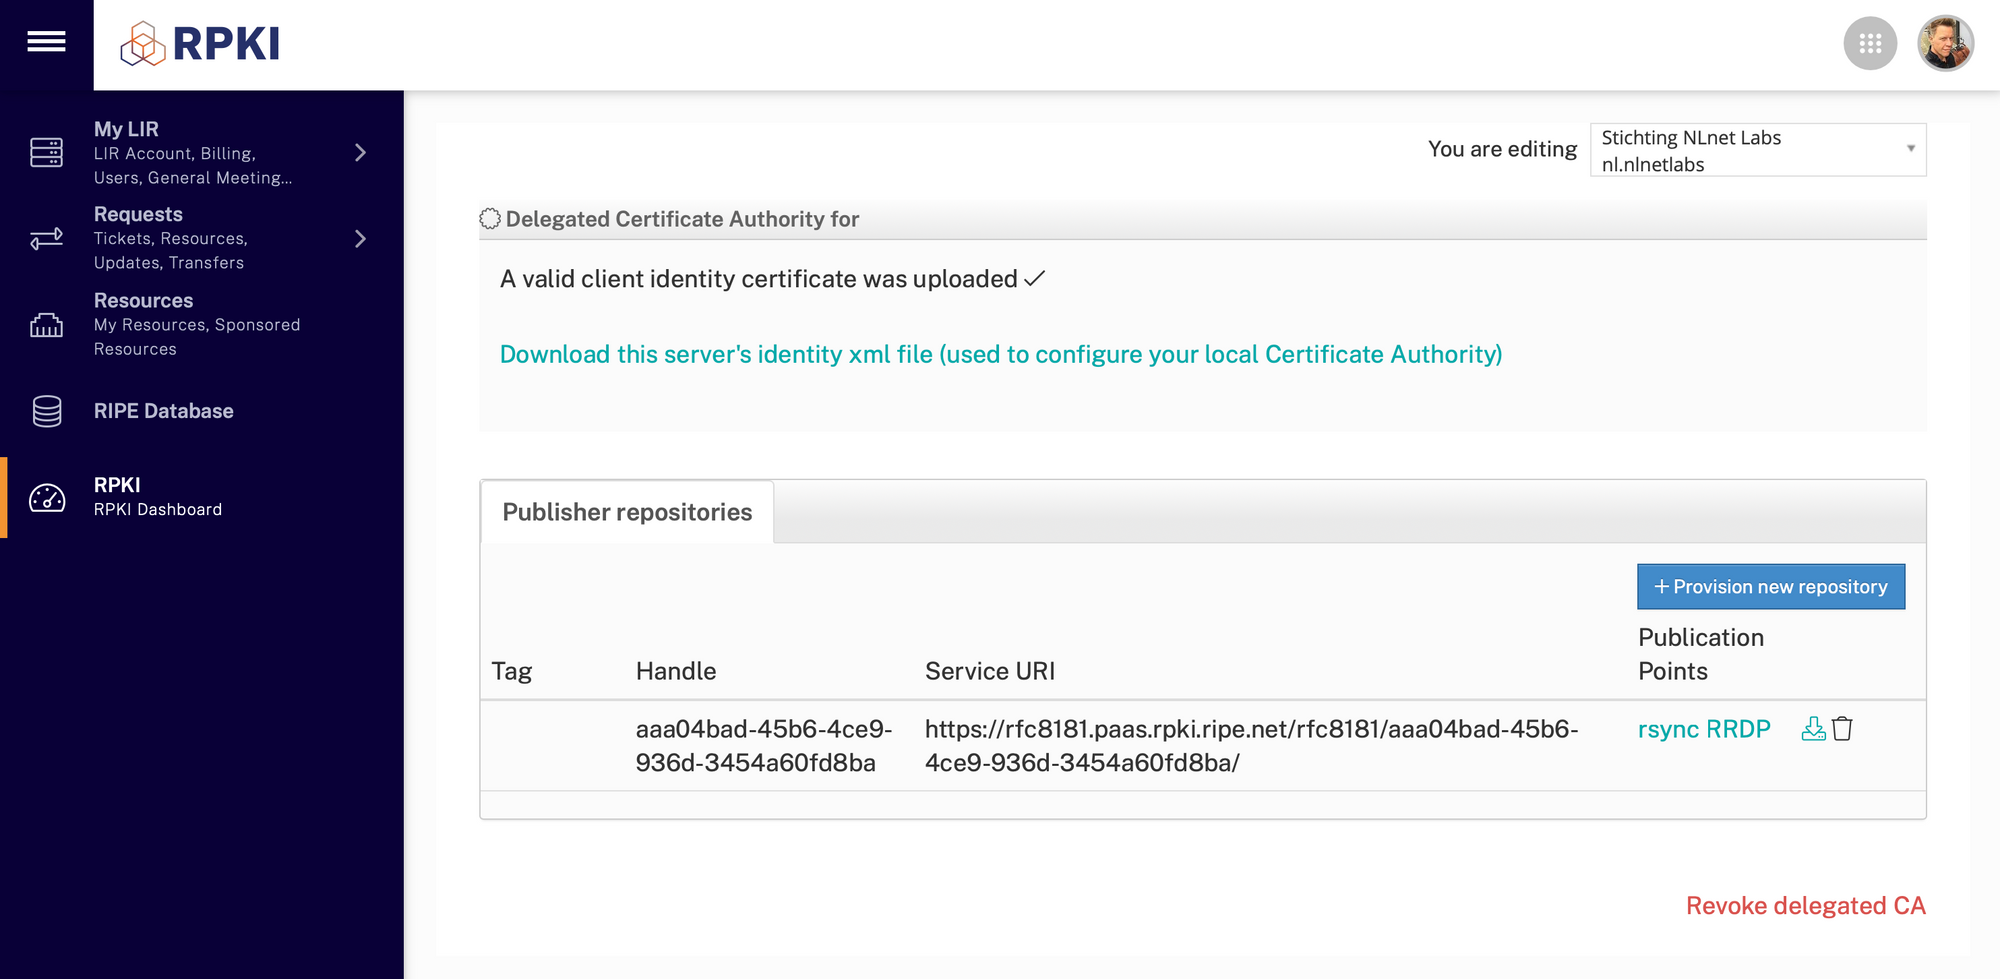
The following screen will show the provisioned repository with your configured publication points. Click the download button to fetch the Repository Response XML file:
Upload the Repository Response XML file into the corresponding field in the Krill user interface and click Confirm. Alternatively, you can do this on the command line using krillc repo configure:
krillc repo configure \
--ca ripe-ncc-demo \
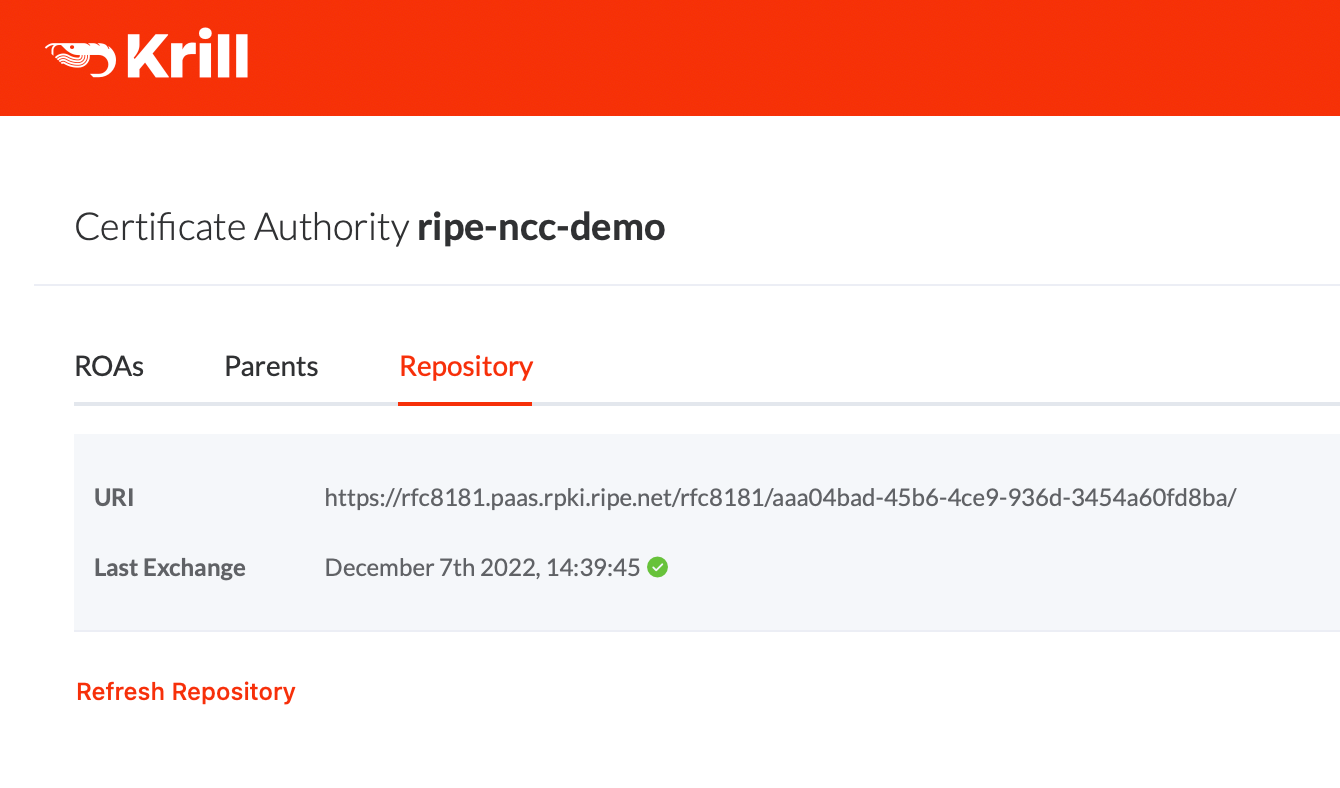
--response ./data/repository-response.xmlIf everything is successful Krill will immediately bring you to the ROAs tab so you can get to work, but navigating back to the Repository tab will show you the details:
This information is available from the command line as well, using krillc repo status:
krillc repo status --ca ripe-ncc-demoManaging ROAs
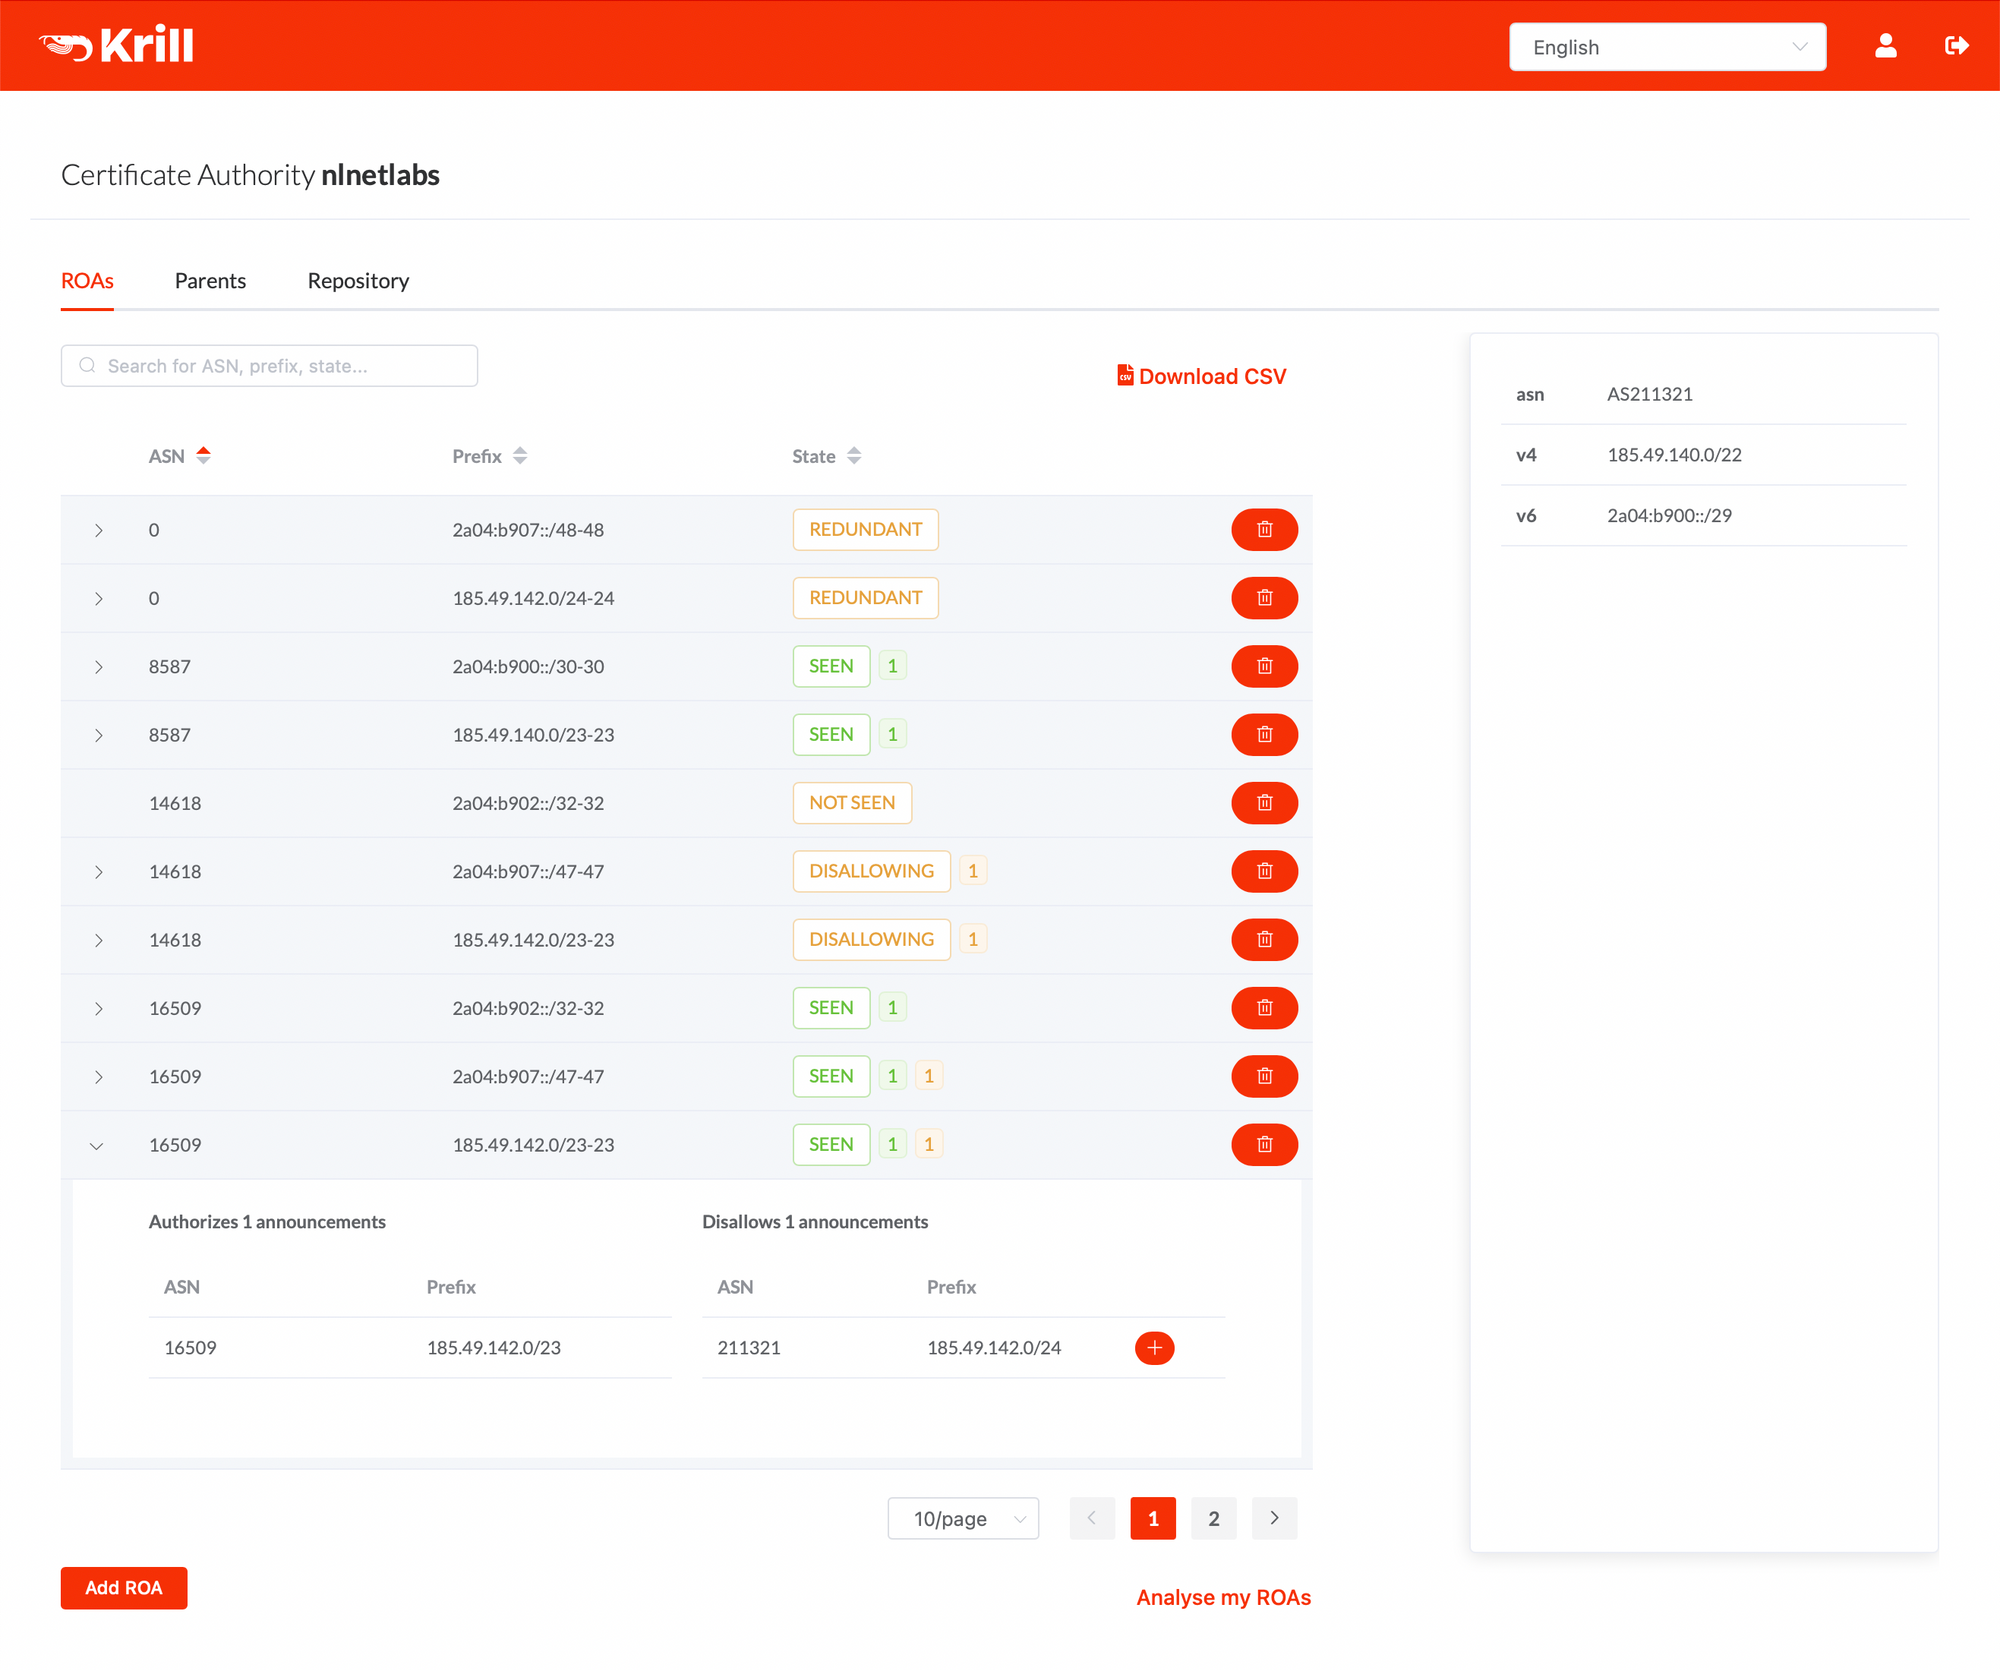
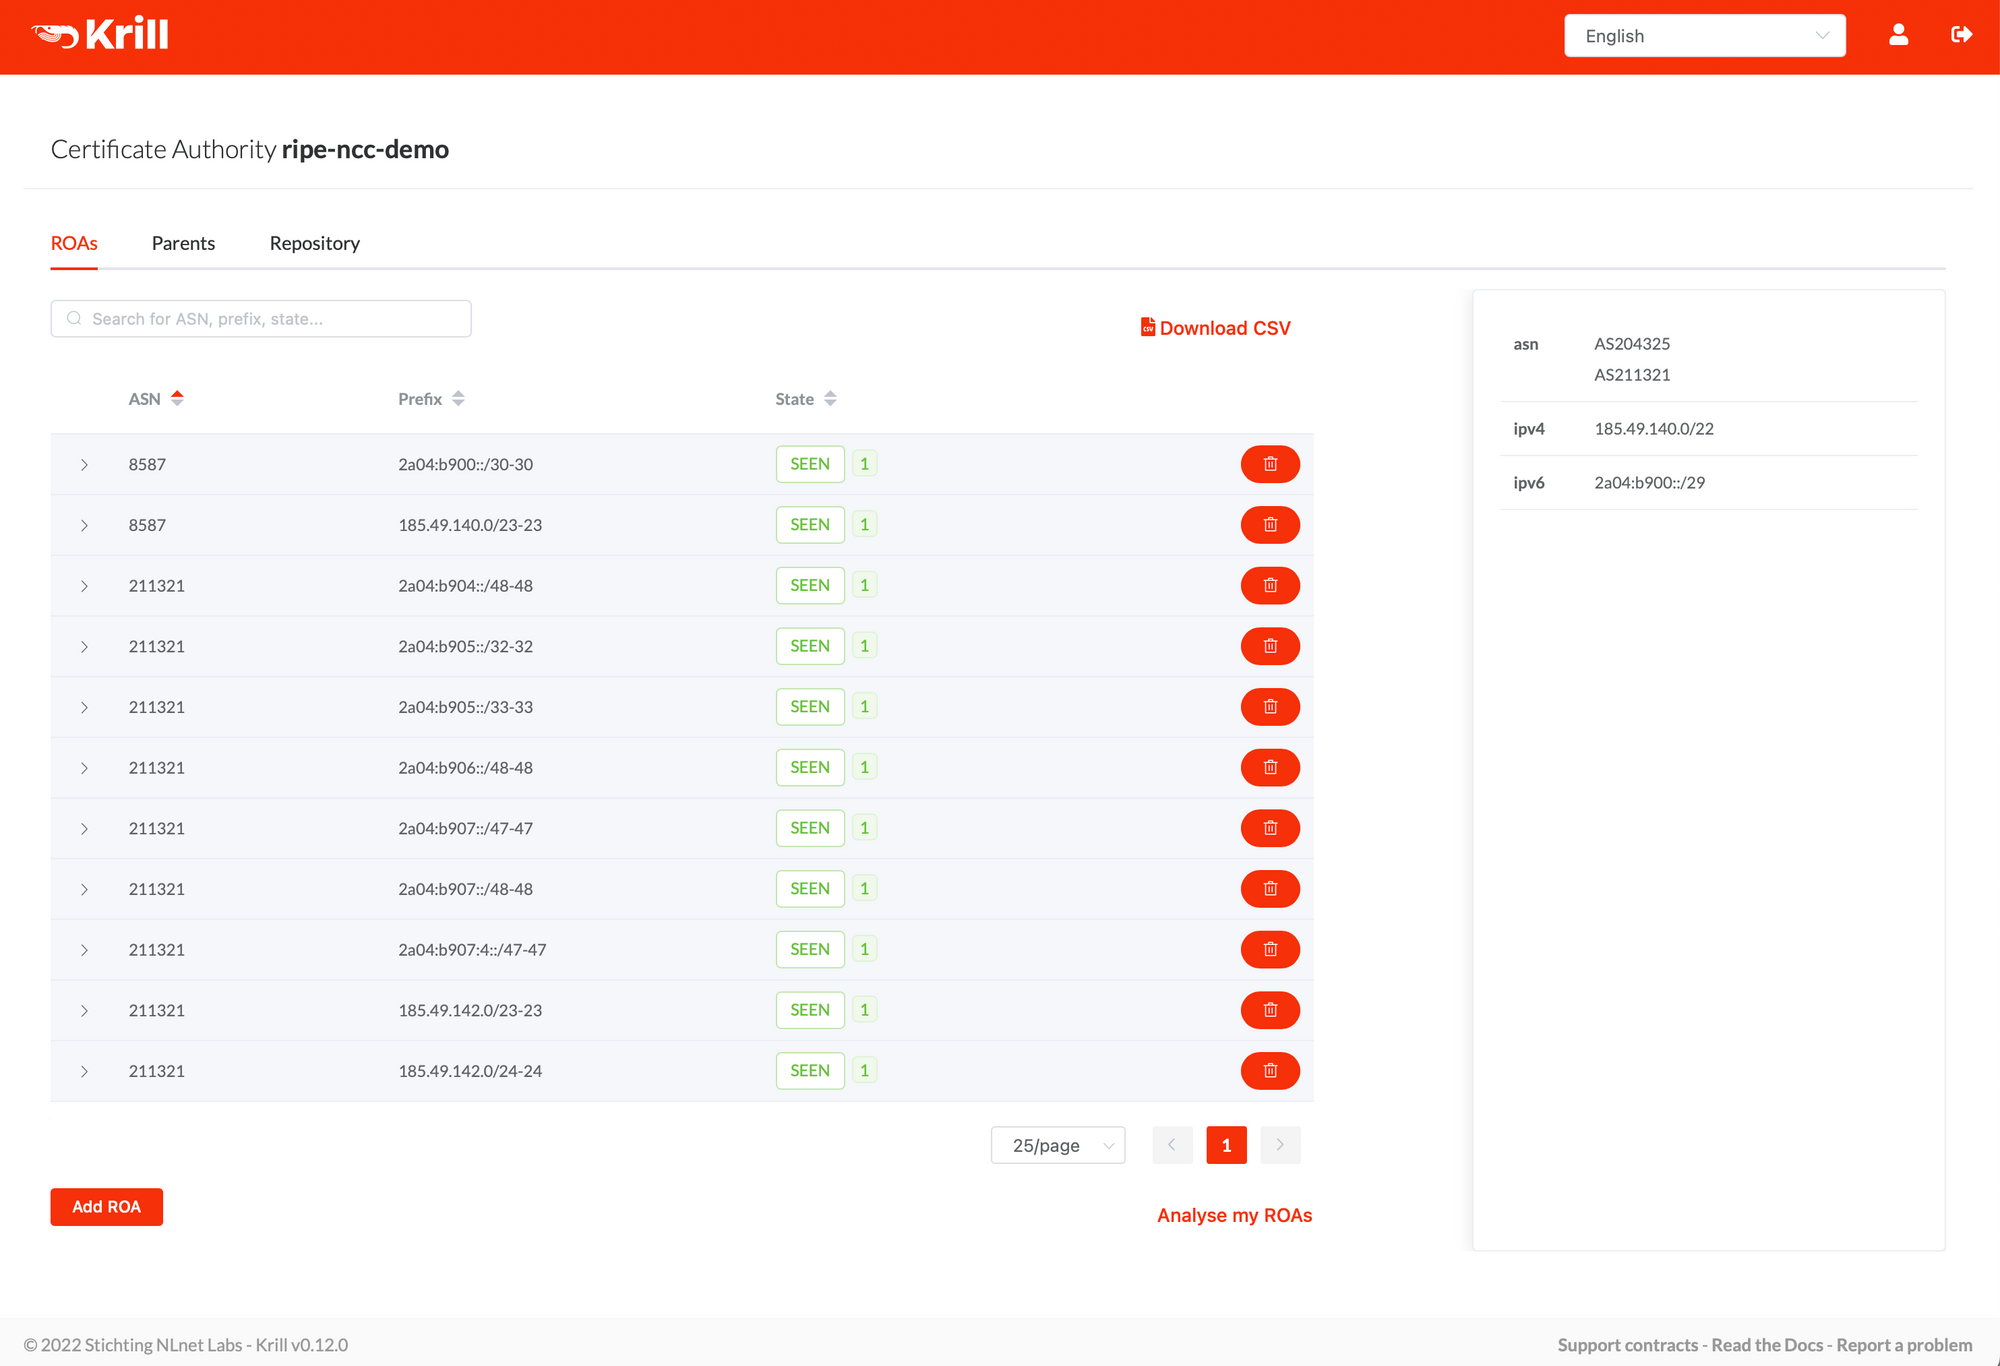
The concept of managing ROAs in the user interface is very similar to what you are used to in the RPKI Dashboard of the RIPE NCC LIR Portal. The ROAs tab will show you all resources you hold, as well as all BGP announcements with your IP prefixes that are seen by the RIPE RIS route collectors.
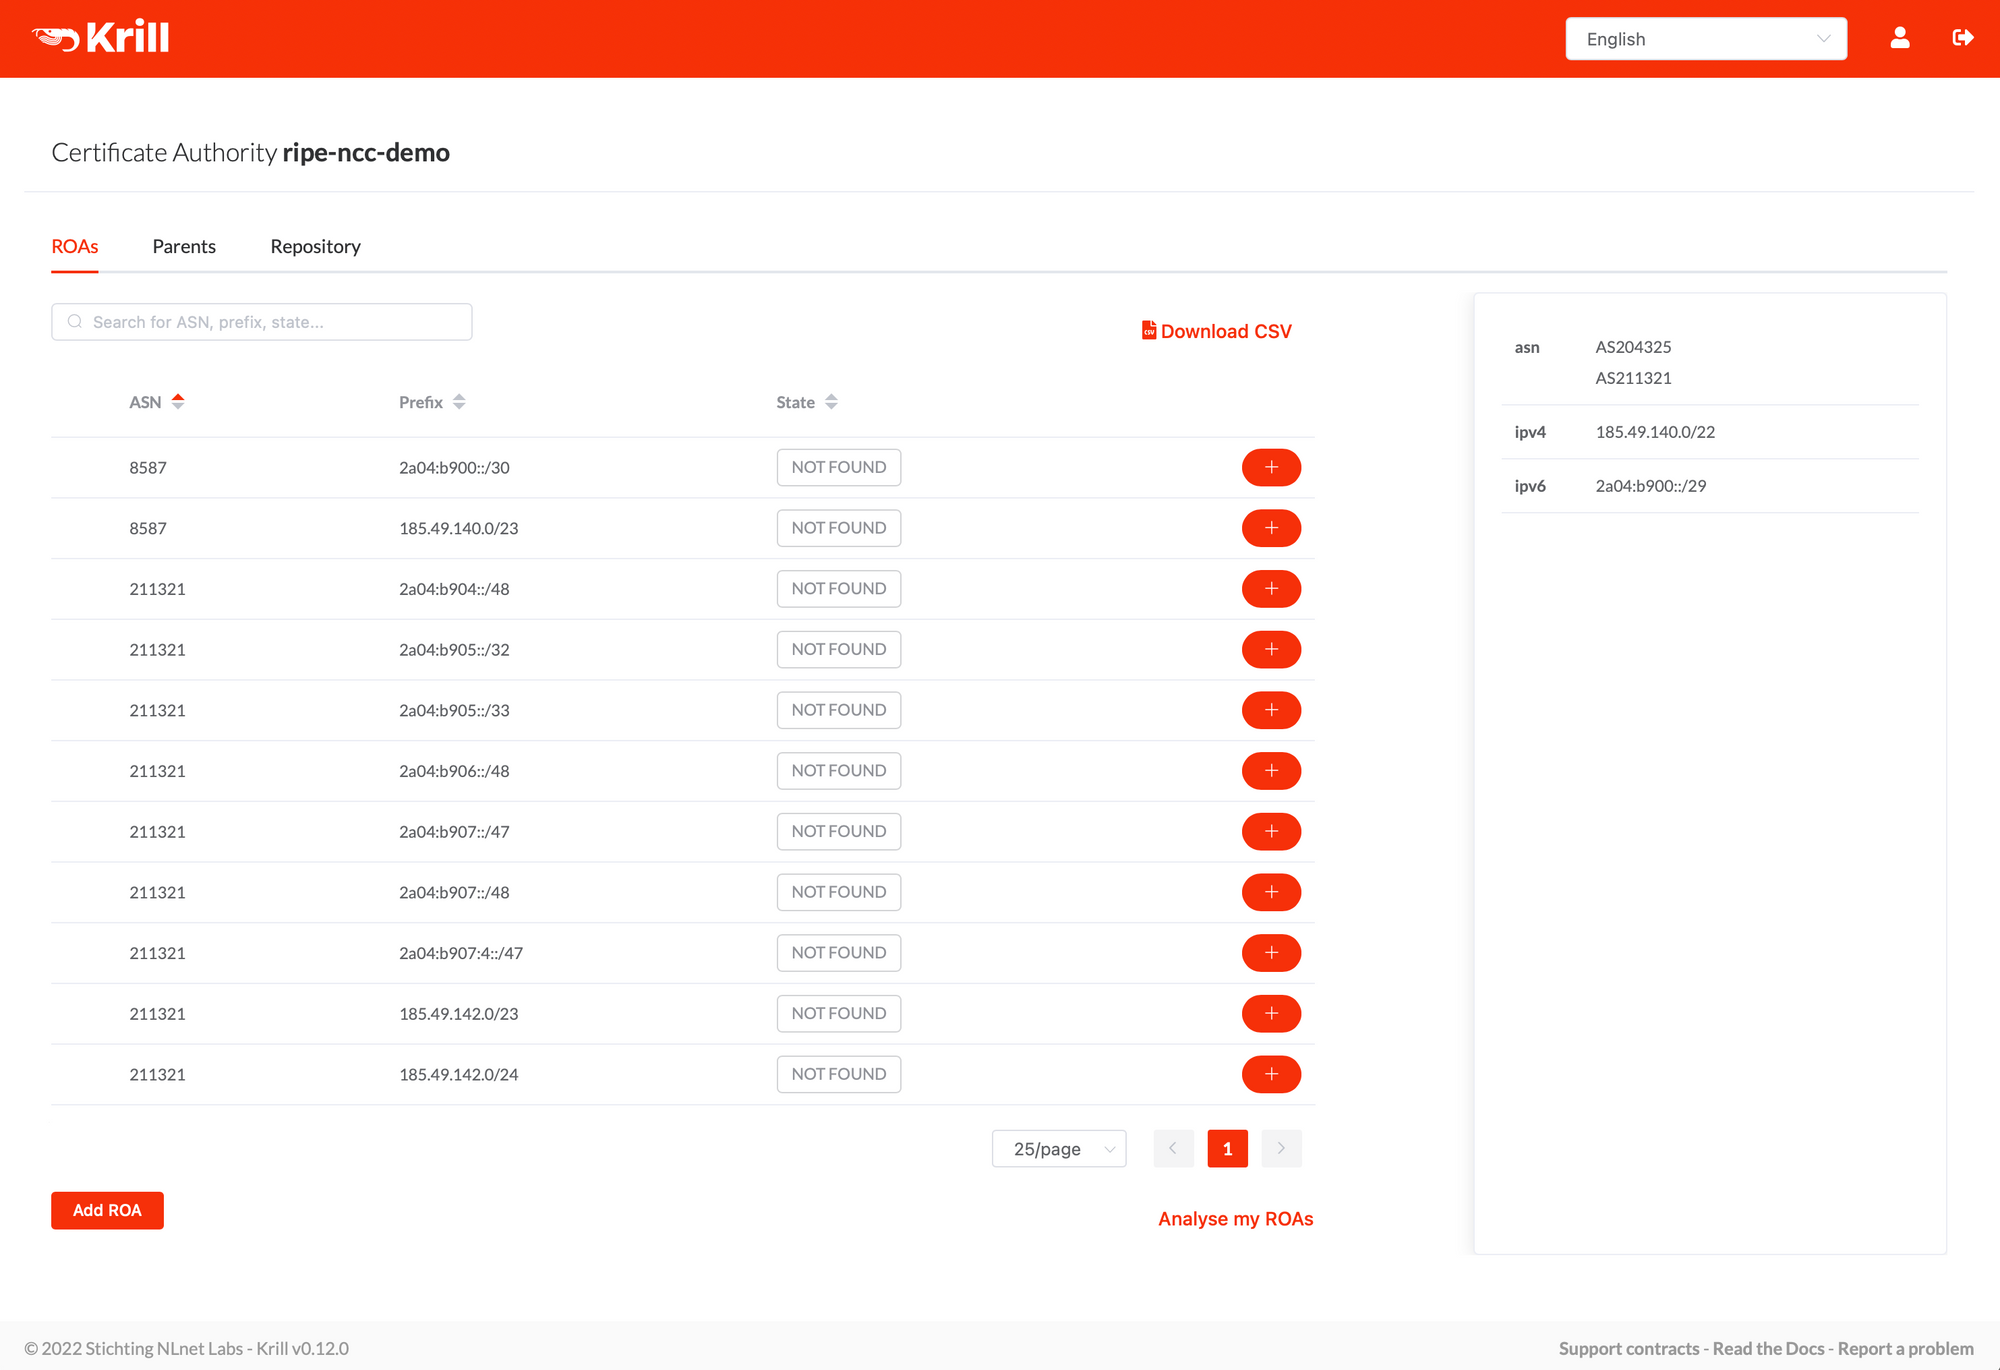
To authorise a route origin in the UI, you simply click the + button to let Krill create a matching ROA configuration for it. All resulting cryptographic objects will be published in the RIPE NCC RPKI repository immediately and be renewed automatically for as long as you authorise the route.
After authorising a route origin, you'll see a green SEEN label appearing that indicates that the route is announced and authorised by a ROA. As your BGP annoucements or ROAs change over time, you can see several other statuses as well, which you can read about in the Krill documentation:
You can of course also manage ROAs using the command line interface with the krillc roas subcommand. The CLI supports adding or removing individual ROAs as well as submitting a file with a delta of additions and removals as an atomic delta. Optionally, you can include comments as well.
Further Exploration
Finally, there is a lot more to discover in Krill, such as setting up Prometheus monitoring, configuring named users with roles and permissions over specific resources and organisation units, using a Hardware Sercurity Module to store your keys, or delegating resources further down to customers or business units, who run a Krill CA as a child of you.
If you need help or additional information, please don’t hesitate to talk to us on our Discord server or mailing list! 👋