Testing the Waters with Krill

We sometimes hear that people have cold feet when it comes to trying out Krill. But, did you know that Krill is at its most prolific in arctic oceans? So, come join us as we guide you through getting started with a Krill instance in a safe and secluded testbed sanctuary that we have set up.
Another Testbed?
Those of you with long memories might remember that we first posted about our public krill testbed a little over one year ago. But, as development has continued since then we decided to redo it. If you are interested in learning how, or if you are thinking of running your own, then please read "Making a Krill Sanctuary".
Here, we will focus on how to quickly set up a local Krill instance for local testing. As such, the setup here will be quite minimalistic. If you want to have some more inspiration on how one could run a production setup for a small organisation, then please have a look at "Braving the Waves with Krill" – where we explain how we did this for our own organisation, using a more advanced feature to allow multi-user access to our UI and our own publication server.
Overview
We will set up a Krill instance on a small virtual machine in the cloud running Ubuntu 20.04 (Focal Fossa), and we will use the NLnet Labs testbed environment to serve as a parent CA and Publication Server.
We will use NGINX to allow secure access to our user interface. In our case we also use letsencrypt, but we will include a pointer on how one can quickly use a self-signed HTTPS certificate and key from NGINX instead.
Set up NGINX and Let's Encrypt (optional)
Krill comes with an embedded web server, and it will generate a long-lived self-signed certificate when it is first started. By default Krill will only listen for connections on localhost. In a non-public test environment, you could use the ip and port directives in the configuration file (below), to force Krill to listen on a public interface and different port.
In our case we chose to run our test instance on a public network, so we decided that we would set up NGINX and Let's Encrypt. Fortunately this is pretty trivial. The first step is to install NGINX:
apt install nginx
Then we removed /etc/nginx/sites-enabled/default and added /etc/nginx/sites-enabled/testbed-client.krill.cloud with the following content:
server {
  server_name testbed-client.krill.cloud;

  # Pass all requests to the krill backend.
  location / {
    proxy_pass https://localhost:3000/;
  }

  listen 80;
}
We enabled NGINX:
systemctl enable nginx
We installed Certbot to help with our Let's Encrypt setup. When it proposed that it could take care of adding the HTTPS configuration, we accepted the offer and allowed it to add the SSL directives to our NGINX configuration:
sudo apt install certbot
sudo apt install python3-certbot-nginx
sudo certbot --nginx
We then added the following to the root user crontab, to make sure that our https certificate would be automatically renewed:
# Automate letsencrypt certificate renewals
0 12 * * * /usr/bin/certbot renew --quiet
Install and Configure Krill
At NLnet Labs, we build public Krill packages for amd64/x86_64 architecture running a recent Debian or Ubuntu distribution, as well as Red Hat Enterprise Linux/CentOS 7 or 8.
In order to make these packages available to our system we created the file /etc/apt/sources.list.d/nlnetlabs.list with the following content :
deb https://packages.nlnetlabs.nl/linux/ubuntu/ focal main
# Uncomment the following if you want to try out RELEASE CANDIDATES!
# deb https://packages.nlnetlabs.nl/linux/ubuntu/ focal-proposed main
Then we added the NLnet Labs key and updated apt:
wget -qO- https://packages.nlnetlabs.nl/aptkey.asc | sudo apt-key add -
sudo apt update
After adding the NLnet Labs package source we simply installed the latest Krill release candidate binary, from the proposed source which we included:
sudo apt install krill
The Krill package will generate a configuration file with sensible defaults when Krill is installed at /etc/krill.conf. This file will not be overwritten if it exists, so any changes you make will be kept on upgrades.
For quick testing purposes we decided that the defaults will be fine. If you are setting up your own test instance, you can check that the random value for admin_token is to your liking, or replace it with something appropriate, as you will need it to log in to the UI later:
# grep ^admin_token /etc/krill.conf
admin_token = "well-erm-no-we-are-not-telling-you"
Then we enabled Krill, and reviewed the syslog messages to see that all is good:
sudo systemctl enable --now krill
sudo journalctl -u krill
Set up the CLI (optional)
If you want use the CLI to access your Krill instance as well, and like me you don't like remembering passwords, then you could add the value of the admin_token to the following environment variable and add it your user profile:
export KRILL_CLI_TOKEN="well-erm-no-we-are-not-telling-you"
You can then see that Krill has started, and you can connect to it from the local machine using krillc info
Version: 0.9.3-rc3
Started: 2021-11-24T14:27:42+00:00
Let the Testing Commence
You should now be able to connect to the web UI of your new krill installation using the admin_token mentioned earlier as the password. In order to create a CA and set it up under our testbed, you can simply follow our "Get Started with Krill" guide.
When it comes to exchanging the XML files to set up a parent CA and Publication Server, you can register your test instance as a CA and publisher using our public testbed service:
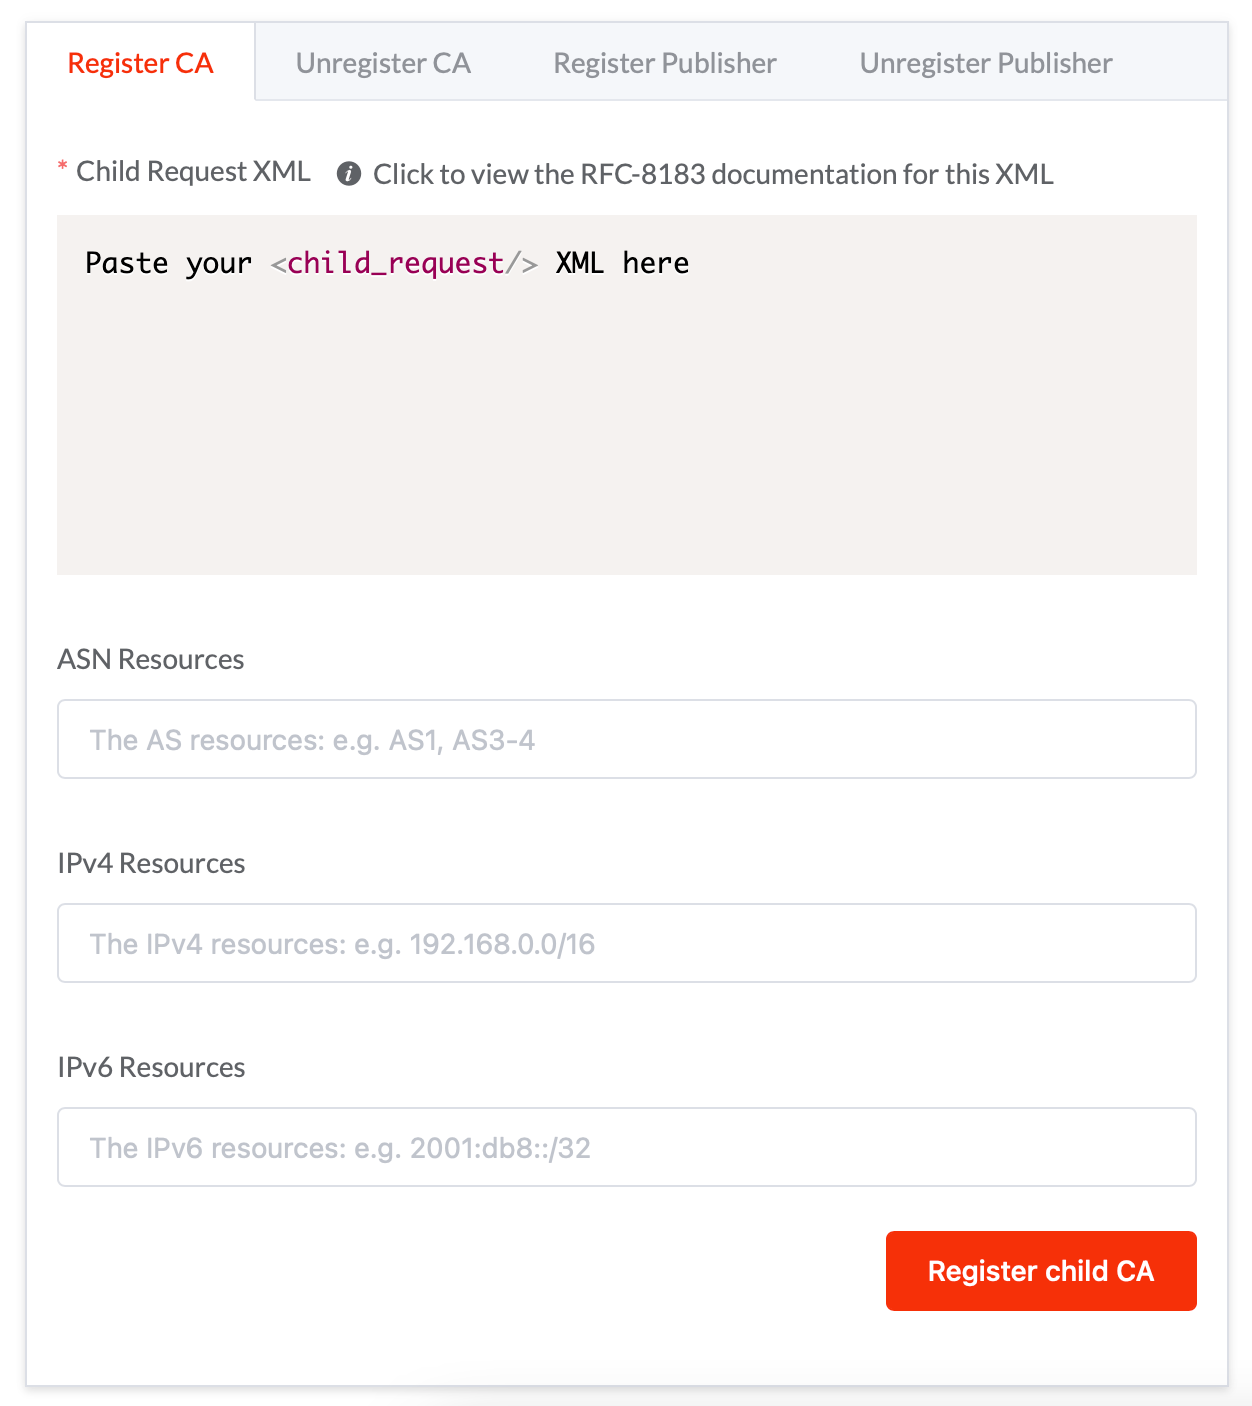
As mentioned on the testbed welcome page, no one should use this in production, ever, but to test your ROAs you can register your CA with any ASN, IPv4 and IPv6 resources, and then use your favorite RPKI Validator with the testbed TAL file.